Italian Rainbow Cookies Veganized

During Christmas, I had this bad habit of being at the grocery store and looking at the ingredients of the Italian Christmas cookies hoping some of them would be vegan. Not a chance. I’ve been craving these all season.

After Christmas, I looked up some recipes for this type of cookie. I wasn’t sure what they would actually be called, but it was easy enough to find. I found this recipe, which I knew I could veganize with the magic vegan ingredient, aquafaba.

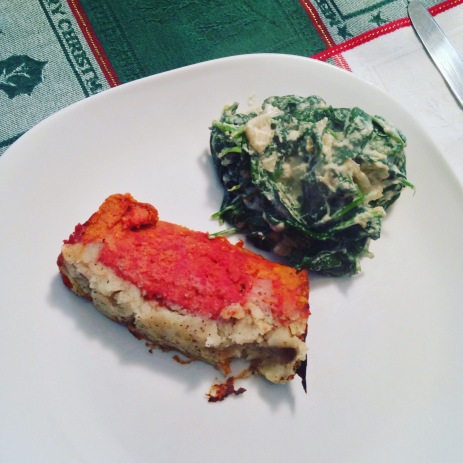
I was so worried I’d really mess up making these a lot earlier on. The parts I thought would fail were not as difficult as I thought. The hardest part was cutting it after I put the chocolate on top, which ended up crumbling a bit and making it not as pretty as I would have liked. The recipe makes it sound much more complicated and some of the steps are needlessly complicated, so I’m re-writing the recipe in the way I did it with the vegan substitutions.

This recipe also required making vegan almond paste (with aquafaba as well!)

That is the first step to making these babies.

Vegan Aquafaba Almond Paste

Ingredients:

  • 1.5 cups blanched almonds
  • 1.5 cups vegan powdered sugar
  • 3 tablespoons aquafaba (chickpea water/brine from a can)
  • 1.5 teaspoons almond extract
  • 1/4 teaspoon salt

Directions:

  1. In a food processor, blend the almonds until smooth and pasty.
  2. Add the powdered sugar, aquafaba, extract, and salt.
  3. Process again until smooth and dough-like (it should form into a big ball).
  4. You may need to scrape the sides down frequently throughout the process.
  5. When finished, set aside 3/4 cup for your Italian Rainbow cookies. You can save the leftovers, it’s super yummy!

IMG_6595

Veganized Italian Rainbow Cookies

Ingredients:

  • 2 sticks plus 4 tablespoons Earth Balance sticks
  • 2 cups all purpose flour
  • 1/2 teaspoon salt
  • 3/4 cup almond paste (recipe above)
  • 3/4 cup vegan sugar plus 2 tablespoons
  • 4 tablespoons aquafaba (liquid from a can of chickpeas)
  • 12 tablespoons aquafaba
  • 2 tablespoons vegan sugar
  • food coloring method of choice (red and green)
  • 15 oz Apricot Jam (not the kind with clumpy pieces in it, you want it to be smooth)
  • 10 oz vegan chocolate chips

Directions:

  1. Preheat oven to 350 degrees F.
  2. Place parchment paper on three jelly roll pans or rimmed cookie sheets and spray parchment with cooking oil.
  3. In a stand mixer bowl, place the almond paste and 3/4 cup with 2 tablespoons of sugar. Mix on the medium speed setting until crumbly.
  4. Cut the Earth Balance into small pieces and place into the the mixture while beating together until all the Earth Balance is in there and the batter is smooth.
  5. Sift 2 cups of flour and 1/2 teaspoon salt into a bowl. Add into the mixer slowly and continue to mix until combined. Do not over mix.
  6. In a large metal bowl, using a handheld electric mixer, place the 12 tablespoons of aquafaba. Whip until foamy. Slowly add in the 2 tablespoons of sugar while continuing to whip on the highest setting. Stop when you have created firm peaks (if you take out the whisks from the meringue, and place them upside down, it will not drip down).
  7. Add 1/3 of the meringue into the batter and fold in with a rubber spatula. Add the rest of the meringue and mix until fully incorporated.
  8. Place the batter evenly into 3 bowls. 1 bowl keep plain, and then add green and red to the other two bowls.
  9. Transfer the batters onto their respective cookie sheets one at a time with a wet rubber spatula . My sheets were too big to be able to spread out the batter entirely, so I tried my best to make the most even shaped rectangles on each cookie sheet so they’d match up when layered together after baking.  Don’t worry too much about it, you’ll cut the edges so they’re prettier when it’s all assembled anyhow. Just worry about making relatively even thickness rectangles for now.
  10. Bake for 4 minutes, rotate the pans around in the oven so that one pan is not on the bottom rack the whole time, and bake for another 4-6 minutes until the edges are slightly browned.
  11. Allow to cool completely.
  12. Spread a thin layer of apricot jam on top of the red layer.
  13. Cut any excess parchment paper from around the white layer. Holding the bottom of the cookie with both hands, carefully line up and flip the white layer onto the red.
  14. Spread another layer of jam. Repeat step 13 with the green layer, but do not place anymore jam on top.
  15. Cover with plastic wrap. Place a clean cookie sheet on top to press down the layers. Place something heavy and even (like two cans on either side) on top of that, and place into the refrigerator for at least 4 hours.
  16. Take off the cans, cookie sheet, and plastic wrap. With a sharp knife, trim the uneven sides into a clean rectangle shape. Let sit for a moment or a few.
  17. Melt the chocolate chips in a double boiler or microwave.
  18. Spread over the top layer and sides with a spatula.
  19. Allow to set, and then cut into smalls squares.
  20. Place in a container and store in the refrigerator or at room temperature.

Enjoy! I know I certainly will!


Happy Holidays! (xmas recap)

I’m in the mood to do a show and tell kind of post, with pictures and descriptions of my Christmas…so here it goes:

*Note: I decided to eat gluten this holiday…I need to go back to eating gluten free because I don’t feel great again, but I wanted to see how I felt with it. I’m glad I don’t have celiacs, but I’m definitely pretty sensitive. I’ve missed some of this food so much though.

IMG_6491

My brother illustrated a portrait of two of my cats for my dad’s business. It’s really cute. Cats seemed to be the theme of our Christmas this year.

In fact, I made a bunch of cat sugar cookies.

IMG_6493

Unfortunately, I am a little weak with my decoration skills.

FullSizeRender (1)

For Christmas Eve we made my Pizza Strips and this caesar salad.

IMG_6500

My orange cat, Sammy, woke me up very early on Christmas morning so I went downstairs to make some cinnamon buns with coffee icing for everyone.

IMG_6510

Yum! They were a hit with everyone. I actually bought pre-made vegan cinnamon buns and just made the icing myself, because it would have been difficult to make them from scratch in the morning and have them ready on time.

Later, we had Chef Chloe Coscarelli’s Pistachio Guacamole from her Italian cookbook for an appetizer:

IMG_6523

For my dinner I made Sporkfood’s frosted tempeh beet loaf. My mom made Chloe Coscarelli’s creamed spinach for me and twice baked potatoes.

IMG_6531

IMG_6532

For dessert we made Chloe Coscarelli’s lava cakes with raspberry sauce, So Delicious coco whip and ice cream.

IMG_6539

And I got quite a few culinary presents in the form of new cookbooks!

IMG_6545

It was quite a delicious event! I hope those of you who celebrate Christmas all had a great holiday!

IMG_6484


Gluten free and Vegan Gingerbread House Info (as promised!)

IMG_6310 (1)

So, I promised I would share some more details about how I made this house! This post will come complete with some helpful recipes and tips.

IMG_6295

My mother bought awhile ago gingerbread house molds…she has 2 of them that make up an entire house. Each mold has 2 different sides with a different style of house on each. They have a victorian house and a log cabin. I’m sure you can find a set online like this with some googling. But if you want something easier, I think you could try one of these templates.

Once you’ve selected a template, have a stash of vegan candy at the ready, you can prepare the gingerbread dough.

Here is the recipe for the gluten free and vegan gingerbread house cookie dough:

Ingredients:

  • 1/2 cup organic non-hydrogenated vegetable shortening
  • 1/2 cup vegan white sugar*
  • 1/2 cup blackstrap molasses
  • 2 tablespoons cold water
  • 2 cups superfine brown rice flour
  • 1/3 cup tapioca starch
  • 2/3 cup potato starch (be sure the only ingredient listed is “potato starch” otherwise you might have a product that is actually “potato flour”)
  • 1 teaspoon ground ginger
  • 1 teaspoon ground cinnamon
  • 1/2 teaspoon salt

* if you are interested in making a tastier structure of the house to eat, I suggest you experiment a bit with adding more sugar.

Directions:

Note: you will definitely need a stand mixer for this, as the dough is really tough and needs to be kind of like cement. It’s also necessary to make the royal icing you will need later to assemble and decorate.

  1. In a stand mixer, cream together the shortening, sugar, molasses, and water.
  2. Add the rest of the ingredients and mix until it becomes a stiff dough.
  3. Chill for at least an hour in the fridge.
  4. Preheat oven to 350 degrees F.
  5. Grease your molds or cookie sheets with spray oil.
  6. If using a mold, press the dough into it, trying as best as you can to make the dough even and filling the edges well. If you are using a template, this will require some extra work. You will need to roll the dough out to be about 1/3 inch thick, place the templates on top, and cut around the template. Take care in transferring the dough to the cookie sheet.
  7. Bake in the mold or on the cookie sheet for 25 minutes.
  8. Let sit for 10 minutes, and then carefully transfer to a cooling rack.
  9. It’s good to let it sit out for a day before you assemble so it can be a sturdier house and you don’t have any crumbling gingerbread houses! (believe me, I think tears have been shed by my mom–and maybe us kids– in Christmases of the past where she was putting the house together and wasn’t patient or calm for various reasons…)

Next, when the gingerbread is made and ready, you will need to create a royal icing. Don’t expect this to taste all that good either. It needs to be like glue to keep the house together and the candy stuck to it. That’s what we’re going for here.

Vegan Royal Icing:

IMG_6306

Ingredients:

  • 4 cups vegan powdered sugar
  • 9 tablespoons aquafaba (the liquid from a can of chickpeas)
  • 1 teaspoon water

Directions:

  1. Start by placing 5 tablespoons of aquafaba in the mixer.
  2. Slowly add the 4 cups of powdered sugar.
  3. Continue to mix while adding the other 4 tablespoons of aquafaba, a tablespoon at a time.
  4. Add a teaspoon of water (you may want a little less, check to ensure a similar consistency as the picture above).
  5. Mix on high speed for ten minutes.
  6. Place into a ziplock bag with a corner cut off or a pastry bag with an attachment that has a wide sized opening (I used the former, it seemed like a safer bet because this stuff really is cement-like).
  7. Use immediately to assemble the house and then decorate with candy.

IMG_6316

To create the house:

This is the fun part, but you need to be calm and patient (and have a fairly steady hand)!

  1. Make sure you have some kind of clean surface to attach it to. My family has always covered cardboard with tinfoil.
  2. Start by making a line or two of icing on the board the size of the first side of the house you will attach to it. Press the gingerbread house piece into it and hold it in place for at least 15 seconds.
  3. Place icing for the connected wall of the house coming from the corner of the already attached wall and up the sides. Carefully press together and hold for another 15 seconds. You may also want to reinforce the inside corner with some extra icing.
  4. Continue to assemble in a similar manner. Take extra care in attaching the roof as this is where disaster can occur.
  5. Once you’ve completed the house, it should be safe to continue decorating. The icing has about a 30 minute window before it gets too stiff and unusable, so you kind of need to work quickly. If you have kids that you are doing this activity with, I recommend placing a lot of the icing on the roof and having them do that first. Just make sure they are lightly touching it, as it might be a little fragile still. Use the icing  for any other candy pieces that need security, but I recommend that you also use another favorite frosting recipe to decorate the rest if you have young kids, it will be less frustrating for them and more fun/delicious.

IMG_6320

I made a snowman out of Dandies marshmallows (that I used lots of toothpicks to achieve this effect with, including one in the middle). Gluten free vegan pretzels make great fences and stuff. Like I said in the other post about this, coconut flakes are great for making snow, but can get messy. I had bought some vegan gumballs to use too, but ran out of icing for them…there are lots of vegan candies and snacks you can use…I wish I had put more chocolate on mine! 😉 Enjoy!


Happy Holidays from Banana Curl, Vegan Girl!

First of all, it’s Chanukah right now, so Happy Chanukah for those who celebrate it! Some of you know from past posts that I grew up celebrating both Jewish and Christian holidays, and I really love the traditions my family has around both holidays.

This year I thought I’d share something a little different and funny. One of my favorite Christmas books as a kid was called “Jingle Bells.” One year, I think maybe in 3rd or 4th grade, I decided there needed to be a Chanukah Bugs version of the book. So, I made it myself! I wasn’t great at spelling…so please forgive that aspect…but here are some pictures I took of the pop up book I had created.

IMG_6280

IMG_6279

By the way–check out my recipe for latkes from last Chanukah!

And as for Christmas–I’ve been trying to enjoy a childhood sense of magic this year because I have felt I need it with all the horrible stuff going on in the world. One of the biggest projects I took on this year was making a vegan and gluten free gingerbread house!

I’m going to make a separate post about how to create your own in a few days or so, but check out my results for now!

IMG_6310 (1)

I managed to find all vegan/gf, gelatin free candy at a dollar store believe it or not! I used gluten free/vegan pretzels, and Dandies marshmallows for a snowman (not pictured, you’ll see them later!).  I wanted to put coconut flakes for snow but it would have made too much of a mess and I had run out of royal icing (made with aquafaba–chickpea brine that is pure magic!) to try to make a fence to keep it in, so I did without that…now I need to find something to do with sweetened flaked coconut! 😉 The gingerbread itself is made with a blend of gluten free flours. Based on my experiments making gluten free cookies and such lately, I knew it’d be perfect for gingerbread houses because it’s so dense. Unfortunately, there isn’t enough sugar in the gingerbread cookie dough to make me actually want to eat more of it…oh well, it’s still a nice decoration!

So Happy Chanukah! And for those interested in more of the gingerbread house, hopefully you will see a post from me soon about how you can recreate it yourself! 🙂