Foodie (Photo) Friday-Vegan “crab” cakes, jalapeno popper wrap, swedish meatballs, cauliflower

(I just realized I need to make an illustration to go along with Foodie (Photo) Friday but I have no ideas and no energy at the moment. Maybe I’ll come up with something later and use it regularly, maybe not.)

Yay it’s Friday! And you know what that means? I share all the recipes I made this week (besides my own) and review them and show the evidence.

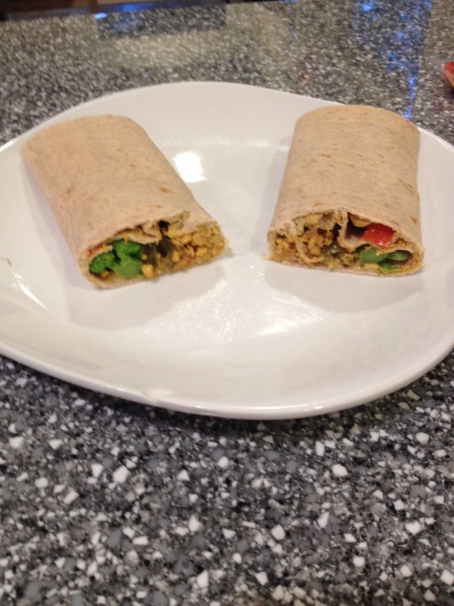
First I made Tempeh Scramble, Jalapeno Popper Dip, Broccoli wraps from Vegan Richa.

Image

Basically, I’ve got no complaints about this recipe. It was really good. I used lavash bread for the wrap. It tasted good when I had just made everything hot, and also when I brought it to school for lunch cold. It tastes really good with extra pickled jalapeno slices put into the wrap though, because the popper dip isn’t quite enough. (I didn’t want to use too much of it because it’s sort of high calorie).

Image

Here’s the popper wrap open with all the goodies inside!

I give these wraps the best rating of all. So,

Image

Next were the vegan hearts of palm crab cakes from Olives for Dinner which I’ve been seeing posted online everywhere basically.

Image

These were a bit of a challenge to make like most kinds of pan fried cake type things, except these really didn’t have any binding material whatsoever. However, they totally make up for them in taste. I don’t know what it is about hearts of palm that makes me think it’s like seafood, but yeah. The old bay seasoning probably doesn’t hurt either to give it that kind of a taste. And the scallions and corn pair really well together and make it that much more delicious. The scallions get crispy. The corn flour on the edges gives it an amazing cake-y texture and a sort of tangy buttery flavor? I don’t know but all I know is that I loved the taste of these.

Even my mom who is not a vegan (but is allergic to all sorts of products, some vegan, some not) loved them, and couldn’t believe they were fake. The good thing (for her) is that these are pretty allergy friendly (although I don’t know if they make gluten free panko?) All I know is that I was happy my mom could try them because they didn’t have soy protein, vinegar, regular onions, etc in them.

Also, I didn’t try to make the sauce, and I really don’t think they need any. They’re that tasty without it. I think the sauce would over power some of the amazing flavors.

One banana is lost because of the lack of binding. All but one of these were able to stay fully in tact when cooked. Most of them were more like crab cake crumbles 😦

Image

That same night I made some curried cauliflower recipe I found on pinterest. I don’t want to post the recipe, because I was not impressed whatsoever. It had way too much pepper in it (which I should have realized and adjusted, I’ll give them that), but otherwise it was nothing like it was described. It used light coconut milk which I thought might get thick and creamy like in the picture I saw of it, but it never did. Here’s a picture of it, but I’m not going to bother rating it because I’m not sharing the recipe (and I feel bad linking to something with a 4 bad banana rating haha).

Image

Finally, tonight I made Swedish Meatballs from the Vegan Table by Colleen Patrick Goudreau. They looked and tasted pretty authentic from what I remember. I used lightlife gimme lean sausage style as suggested for the “meat” in the ball (teehee). I didn’t have any ground allspice, only whole, so I went outside and basically hammered all the whole allspice I had in a ziplock bag and voila! there was my ground allspice! It worked out pretty well.

I served it over egg free ribbon noodles.

Image

Yum! This gets a perfect rating yay:

Image

Well, that’s all for tonight’s edition of Food Porn Friday! Hope you enjoyed this edition, and also I hope you enjoyed my other recipes I posted this week. I’ll be finishing my pumpkin ice cream later on, and I think my brother’s belly is still happy from all the wasabi pea crusted tofu he ate! Check out those recipes below if you haven’t already!

Pumpkin Ice Cream with the secret vegan “cream” ingredient that makes it amazing!

Okay, so pumpkin ice cream recipes may not be too original or anything, but the taste of this one I just made certainly is.

It basically tastes like pumpkin flavored frozen whipped cream.

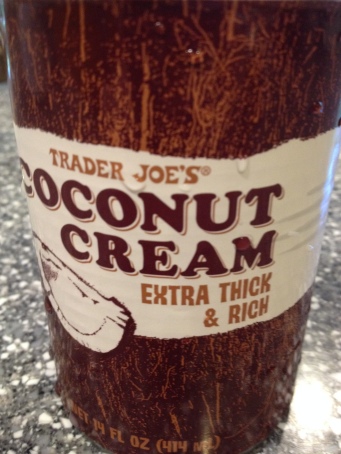
The secret ingredient? A can of this:

Image

It requires an ice cream maker. I used the kind where the base of the machine gets frozen and then you pull it out of the freezer right before you’re about to put the ice cream liquid inside, turn it on, and let it mix itself until it turns into ice cream. I don’t know much about ice cream maker varieties but I love this one, and think it works quite well. Mine is a Hamilton Beach brand maker.

Image

The Creamiest Vegan Pumpkin Ice Cream Ever

Recipe:

Ingredients:

1 cup pumpkin puree

1 14 oz can coconut cream (I’m really not sure where you can find this otherwise besides Trader Joe’s so let me know if you find one elsewhere? Regular coconut milk in a can will NOT yield the same results but you could try it with some sort of thickener maybe? hmmm)

1/2 tsp cinnamon

1/2 tsp vanilla extract

1/2 tsp liquid stevia

1/4 cup maple syrup

Directions:

  1. Place all ingredients in a blender.
  2. Pulse until combined.
  3. Prep ice cream maker.
  4. Pour ice cream base into ice cream maker according to your machine’s directions.
  5. The time it will take to turn into ice cream will vary according to many different factors, so when it looks like ice cream or your preferred ice cream consistency, stop it. It sometimes helps to pour into a container and freeze for a bit if it’s still somewhat soupy and not turning into ice cream after awhile (at least let it run for a half hour before you do this, but then again, read your machine’s directions and gauge it by those).

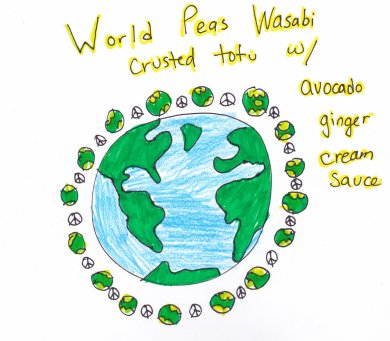
World Peas Wasabi Crusted Tofu with Avocado Ginger Cream Sauce

Okay, so I was eating some Wasabi peas I got from Trader Joe’s and was thinking “hmm, this would make an awesome type of bread crumb!” So after I continued to eat them, I started to become obsessed with the idea of making tofu recipe with them.

I wasn’t sure if I actually liked it at first…the heat of the wasabi wanes considerably when cooked this way. I also didn’t get a chance to try it until it was cool. However, after seeing my adult brother devour the rest of the batch, and tell me he loved it, I figured it was worth sharing.

For the Avocado Ginger cream sauce,  I was inspired by sushi. Avocado sushi is my favorite, and I guess I’m weird but I love to eat the ginger slices along with it in the same mouthful. I also got the idea of using vegan cream cheese because non-vegan sushi uses cream cheese sometimes, and thought it’d be good veganized. The added vegan mayo was mostly to make it a better consistency, but I was also thinking of the spicy mayo I’ve seen on sushi before as well.

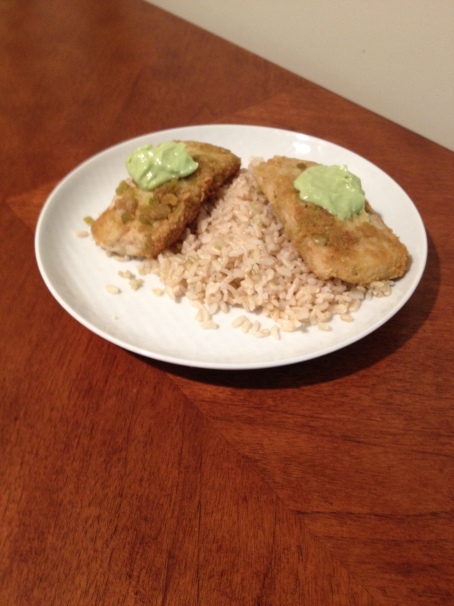
I ate it with cooked brown rice, but it might be cool to form into onigiri and place the tofu on top, or put it in a hand roll (the rice, tofu, avocado sauce wrapped in a nori sheet).

Image

Wasabi Crusted Tofu with Avocado Ginger Cream Sauce

Recipe

Ingredients:

For the tofu:

1/2 cup wasabi peas

2 tbsp cornstarch or arrowroot

1 cup water

1/2 cup unbleached all purpose flour (more as needed)

1 1 lb container of extra firm tofu (I used firm black tofu plus by nasoya and it didn’t hold together all that great, so I think extra firm tofu would work MUCH better) sliced into 8 equally sized slices width wise

canola oil, enough to cover a large frying pan/skillet and a little extra

For the Avocado Ginger Cream Sauce

1/2 an avocado

2 1/2 tbsp vegan cream cheese (I used Trader Joe’s brand)

2 tbsp vegan mayo (I used Nasoya Nayonaise but Vegenaise would be better)

1 tsp lime juice

1 tsp grated fresh ginger root

1/2 tsp vegan sugar

Directions:

To make the tofu:

  1. In a food processor or blender, crush wasabi peas until mostly into a powder but with some pieces of peas still partially in tact.
  2. Place wasabi pea powder in a bowl and mix with 2 tbsp cornstarch or arrowroot.
  3. Place water in a separate bowl, and flour in another.
  4. Drain the the tofu and lightly pat dry. Cut width wise into 8 evenly sized (as close as you can) pieces.
  5. Heat oil in pan at medium heat. You’ll know when it’s ready to put the tofu in it when you place a smidge of the pea mixture in the oil and it sizzles and fries up instantly.
  6. In the meantime, begin to prepare the tofu. Dip each slice in the flour on both sides, then place in water, and then coat into the pea-cornstarch mixture. Place on a plate until oil is ready.
  7. Prepare a plate with a paper towel next to the frying pan to absorb the oil of the tofu once they’re done cooking.
  8. When the oil is heated enough, place each tofu slice in the oil. Cook on each side until golden brown and crispy.
  9. Take out carefully with a spatula or tongs and place on prepared paper towel plate.
  10. Let cool until an edible temperature, and then eat along with the Avocado Ginger Cream Sauce and rice or whatever you like.

To make the Avocado Ginger Cream Sauce:

  1. Place all ingredients in a food processor and blend until smooth and creamy but not too thin.

Image

My results! If you make it, lemme know what you think, yeah?

Thanks for reading as always! Like my facebook page if you are enjoying the blog so you can keep in the loop of new entries, or follow me on twitter! I also have a board on pinterest devoted to the blog if that’s your thing, as well!

Foodie (Photo) Friday is here (and almost over, haha!)

This week I only made about 3 big meals and had leftovers the rest of the week (except for breakfasts which was mostly french toast and other un-exciting stuff).

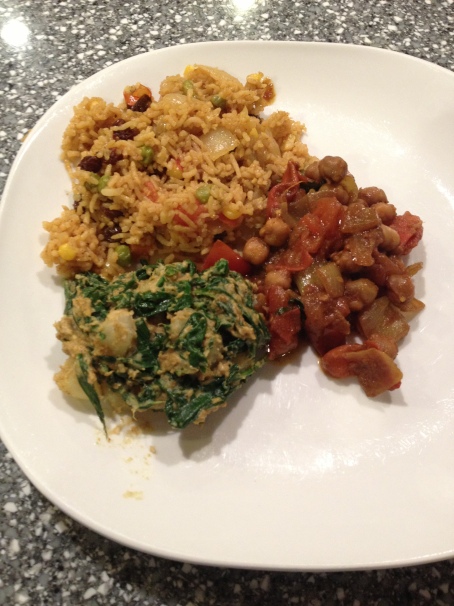
First, I made the Indian Buffet Trio (Saag Aloo, Chana Masala, and Vegetable Biryani) from the Chloe’s Kitchen cookbook.

Image

It was really good, all of it but I especially love the Saag Aloo that’s made with cashew cream (which came out awesome in itself!). I think I may have slightly messed up the Chana Masala by being forgetful. I really like the biryani, the raisins make it really good and I normally will not touch them ever…so that was a nice surprise.

Image

I give this a 4 good bananas, 1 bad rating

I also made jackfruit for the first time! I made a bbq pulled pork style crock pot thing from the newly released cookbook by Natalie Slater, entitled Bake and Destroy. The dish is called “Cannibal Corpse Crock-Pot” which I think is pretty hilarious. I unfortunately forgot to take a picture of just the pulled jackfruit, but I did take a picture of it when I made another entree from the cookbook called simply “BBQ Salad.” It’s kale, red beans, onions, garlic, the jackfruit, brown rice, and vegan ranch dressing.

Image

Image

I rate the salad 4 good bananas, 1 bad, but the Cannibal Corpse Crock-Pot by itself would probably get a 3 good banana rating

The jackfruit itself is quite surprising. I had it alone in a sandwich to get a good idea of how it is by itself. It’s texture is not as “meaty” as people have been saying, in fact pineapple may have more of a meaty texture than jackfruit. Though, it does give a good shredded pork appearance. It’s also quite tangy and sour. Personally, I don’t think using a ketchup based BBQ type sauce was the best idea to pair it with, just because I have problems with acid reflux, and so it was a bit too acidic all combined. I might try it with a more typical type of BBQ sauce some other time and see how it goes. I do have another can I want to try and experiment with!

In the salad though, it was much better. All the flavors combine and it is just really yummy! I particularly like the ranch because it’s thick and mixes well with all the other flavors. It’s also the first recipe that I cooked the kale properly with (I usually make it raw because I can never cook it so it’s hot enough).

Finally, I was really craving a good delicious vegan Mac and Cheese but I was skeptical that I could find a good recipe for it. I hate most of the kinds I’ve tried so far, especially at some local restaurants where it’s popular (I won’t name names haha). I found a more cashew based recipe from Vegan Table by Colleen Patrick Goudreau and it was sooooooo amazing. I didn’t bake it but I bet it would be amazing baked. It gets even better as it’s reheated in leftovers.

Image

Image

This definitely gets a perfect rating! I’m so picky with vegan Mac and Cheese and this one’s worth it!

I hope you all enjoyed this edition of Food Porn Friday! These pictures should give you something to drool over until next week! Or perhaps I’ll have the time to create a new recipe or blog about something else before Friday! We’ll see, I’ve been busy with the start of the school semester and am still adjusting to being back.

Becoming a Healthy Vegan

I’m on a quest to become a healthy vegan. Becoming a healthy vegan may not always mean the person trying to become healthier needs to lose weight, but for me it has. I started out obese, and a doctor’s visit before I went back to veganism showed that my cholesterol was high, and so was my blood pressure (for my age especially, which scared me, which is why I started this quest right away after realizing it all). So far I have lost a bit over 50 lbs, and am really happy so far with my progress. I want to share some ideas I have about how people can become a healthy/healthier vegan, based on what’s worked for me and also what I’ve read about and the information I’ve absorbed.

As I like to say, often when talking to non-vegans about veganism, it is entirely possible to be an unhealthy vegan. People seem to think vegan = healthy or vegan=skinny but that’s just not true all the time.  Just taking a look at all the mainstream brands listed here that carry “accidentally vegan” products will give you an idea of how that’s possible (note: I’m skeptical that some of these are completely vegan, as some may have bone char sugar used sometimes, etc so eat these at your own risk).  Plus, vegan companies (and companies that aren’t exclusively vegan but market vegan products occasionally) are often devoted to veganizing non-vegan junk food staples.

My philosophy about becoming a healthy vegan though is to not give up too much more than what I have to. I’m already refraining from dairy, meat, and other animal derived products (for many reasons- both ethical and health-wise), so having junk food in moderation, or a good helping of pasta (like the cashew mac and cheese I made the other day) once in awhile isn’t going to totally hurt me. Especially if you look at the types of foods I’d typically eat when not vegan.  I mean, if you want to totally cut out all overly oily, starchy, sugary, types of snacks and meals all the time, and stick to just the healthy necessities,  then I commend you! But personally I feel like I will be too grumpy without indulging sometimes. It’s okay to have treats as long as I don’t go overboard or neglect other healthier and important food groups.

With that in mind, I try to eat at least 7 servings of fruits and vegetables a day, but really, I aim for at least 10! The most I’ve ever done in a day since trying to increase my consumption of fruits and veggies is 15 (but I counted 5 of them from my shake, so maybe that’s technically cheating?) I try to have well balanced meals with every main food group involved but that can be difficult especially because I personally can’t eat 3 large meals only a day…I need to have 3 medium sized meals a day at normal mealtimes and about 3 other small meals (basically snacks…but not always junk food snacks) in between or I get too hungry and irritable feeling.

So, you may have seen it on pinterest or my facebook page (which by the way you should like it here if you haven’t already!) but a little while ago I illustrated a vegan food pyramid to put in a post like this.  I’m really excited about it because it looks SO AWESOME. I definitely put a lot of love and time into it. It’s not a perfect nutrition guide, but hopefully it can give you an idea of what a vegan food pyramid would be like, and all the different examples of awesome food we vegans eat. It’s not a comprehensive list of all the foods in each group, because, uh, the possibilities are so abundant and always expanding and I wouldn’t have room for that on a 8.5×11″ paper… (my hands would’ve hurt 1,000x more too after it was “complete” hehe). Anyways, without further ado (Please click on it to see a larger, more readable size):

food pyramid

I can’t say I follow this perfectly every day, but I do make sure that I eat at least 7+ servings of veggies most days, and that basically everything else is met throughout the day. I just don’t necessarily make sure every meal is the way the food pyramid says to do it (I based/adapted my image off of a vegetarian food pyramid I saw on the back of a can of chickpeas). I have given up all carbonated beverages after reading in several places how horrible carbonation is for your body (never mind the artificial sugars or fructose syrup they’re often ladled with), only cook occasionally with alcohol (but never drink alcohol or do drugs!) and only have about 1 cup of coffee a day. These things are definitely good to keep in moderation if you  don’t want to completely abstain from them.  I probably should have had something about smoking and drug use illustrated too, because I don’t recommend that in order to get healthy either, but yeah! And I drink at least eight 8oz glasses of water a day (I’d rather get my calories from food, not drinks that neglect to make me feel fulfilled.) Also, exercise is so good for you! It helps me a lot with mood problems and has lots of other benefits for your body, such as ability to decrease blood pressure, lose weight, stay active and sharp-minded, have fun, reduce stress, combat depression, etc (the list goes on and on!)

In addition, there are some really great tools I have found. For me, it’s made sticking to my goals much easier if I track my food and exercise every day and am completely honest with myself about it. The best place to do it I’ve found, is a website sparkpeople.com. I love this site because not only does it have a calorie tracker, but it also takes some of the guess work out of figuring out a calorie range you need if you want to lose weight healthfully, has an exercise tracker and lots of exercise demos (both strength training and cardio), lots of ways to get support from people on the web (especially people like me trying to get healthy or trying to lose weight), message boards, health articles, recipes, etc! It can be a great way to get a fairly good idea whether you need to ramp up your B vitamins and other vitamins and nutrients because it keeps track of how much you’ve consumed through food each day. It’s the best. I recommend it to everyone who asks about what I’m doing or who talks to me asking for advice based on my success so far. The best part is it’s a completely free website except for the sparkcoach, which I don’t need or want…haha.

I also like some exercise apps on my iPhone, such as Runkeeper and Gympact. Sparkpeople has an app that is really useful, although that does cost a small amount to purchase from the app store. It has all the same stuff as the website has though, I just like it because I can track things on the go without having to go to the computer all the time.

Also, if you’re reading this as a non-vegan and want to know more about simply becoming a new vegan, here are two great resources I recently found:

Going Vegan Isn’t Crazy (Reader’s Digest)

Go Veg Guide (Vegnews Magazine)-for people ready (or who may need some convincing!) to take the Vegan plunge (in .pdf form)


Foodie (Photo) Friday!

Starting this week, every Friday I plan to post pictures of the food I’ve been making (with recipes and reviews, if possible) since the last Foodie (Photo) Friday entry. This first entry has a bit more than a week’s worth (and some things I made may be missing because they have been included in my other blog posts or I couldn’t get a good picture of it before I ate it all), but they’ll typically convey a week of food making. Some weeks will probably have way less food in them than others, if I eat a lot of leftovers or prepared vegan foods, so keep that in mind. Aside from writing this blog, I also go to college and do other stuff. heh.

 So without further ado, let’s get foodie:

Image

Cajun quinoa cakes with lemon dill sriracha remoulade

Cajun Quinoa Cakes with Lemon Dill Sriracha Remoulade

Recipe here

Review: Meh. These were very difficult to cook, because they didn’t mold together very well and I didn’t want to add more flour (my own fault though probably). The quinoa cakes themselves were pretty good, although keeping them in the oven like the recipe says to do dried them out considerably more after they were fried. So they became very crispy and…not moist which would have been tastier. The remoulade was gross, in my honest opinion. I do like sriracha, but I guess I’m not a “Sriracha Lover.” Also, have you seen how much sodium is in 1 tsp of sriracha? As someone who is trying to improve her blood pressure, this is not a good thing. My bottle of it has 2,500 mg in one TEASPOON! And this recipe called for 1/4 cup! So if I ever wanted to make this again I’d try and use less sriracha. It was way too spicy for me anyhow. I think maybe a tbsp would be better than a 1/4 cup!! But even then, I think I should personally avoid it. I just like to try people’s original recipes first before I tweak anything in it (unless I know they’re using way too much salt, pepper, oil, etc and the recipe will be okay without it)…

Anyways, I’m gonna rate this a 3 good banana, 2 bad rating, mostly because the quinoa cakes themselves were decent.

Image

Image

Spinach Artichoke dip

Spinach and Artichoke dip

Recipe here

(my photo is the main picture there because there were not any pictures uploaded yet until I did! but I didn’t create the recipe)

I ended up adding a 1/4 cup daiya cheddar shreds to the recipe. It is quite good, and is pretty healthy. I’m not sure how to describe this recipe but there were no issues with the directions or ingredients and it is pretty standard tasty spinach artichoke dip. I wish I could find a recipe though with silken tofu that doesn’t have a strange after taste, but thems the breaks, I guess 😉

Image

Image

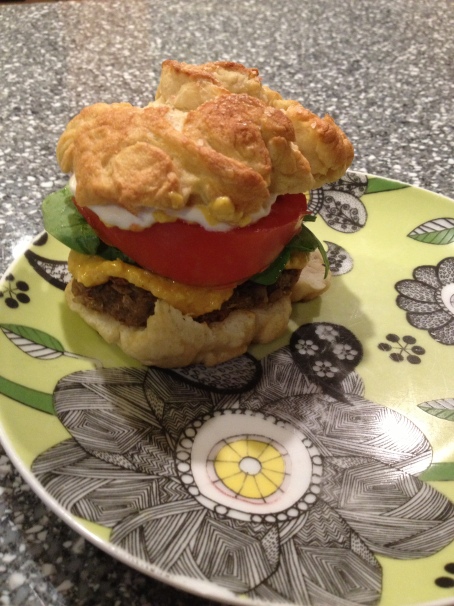
Pretzel burger slider

Pretzel Burger Sliders

Recipe from Vegnews Magazine August 2013 Issue (No link, sorry!)

Okay, first of all the pretzel buns were difficult to make but I will not complain about that because I knew that would be the case…My only regret is that I didn’t follow the recipe carefully enough and probably left out two pretty crucial ingredients which is probably why they do not look exactly pretty. But they came out good enough to eat. The slider burgers are decent, but a little chewy because they have a cup of vital wheat gluten in them but don’t boil or precook them in any way before baking. They were also really moist. They taste good with the whole package, but probably not by themselves or in a different presentation. The smoked cheddar sauce recipe that was suggested to make in the recipe series was my favorite. The last time I made one of the other burger recipes in this section of the magazine the pepper jack cheese sauce was good as well, so I expected the cheddar to be good too, and it did not disappoint. I wish I could find a way to make it less lumpy, though.

Image

Image

Baked Zucchini Fries with Bloomin’ Onion Dip

Baked Zucchini Fries with Bloomin’ Onion Dip

Recipe here (note: to veganize use 2 flaxmeal eggs or powdered egg replacer and water to an egg white thickness, vegan Parmesan, vegan margarine, vegenaise, agave or bee free honee)

My only complaint really (which is kind of a big one) is that these take forever to make. And they don’t translate very well with the flaxmeal eggs, if I make them again I may try using unsweetened almond milk instead and see if the panko coating sticks better. However, the caramelized onion “bloomin’ onion dip” is what makes this recipe worthwhile. It is amazingly yummy.

Image

Image

Matzo Brei

Matzo Brei

Recipe here (by my absolute favorite cookbook author, Chloe Coscarelli)

I’ve never had an actual matzo brei before. I’m assuming it maybe is made with eggs and is sort of like an omelet? That’s the picture I get when eating this delicious vegan dish. I did make a few changes, I only used 1/4 tsp salt and pepper, and reduced the oil for the veggies in half because it also had 4 tbsp of margarine in it (to keep it fairly healthy). My only real complaint of any sort is that it might be even tastier if the matzo in it has a bit of a crunch left in it. I let it get completely soggy, and I don’t know if it’s supposed to be that way, but I bet it’d be yummy with a slight crunch! I ate this for breakfast and loved it, and my non-vegan brother did too! 🙂

Image

That’s all for this Friday’s (the 13th! good luck!) edition of Foodie (Photo) Friday! Let me know if you try any of the recipes I linked to and how you liked them/whether you agree with my reviews, etc! Bon appetit! (As my brother would add, “Don’t eat your feet!”)

Vegan Junk Food Review

Image

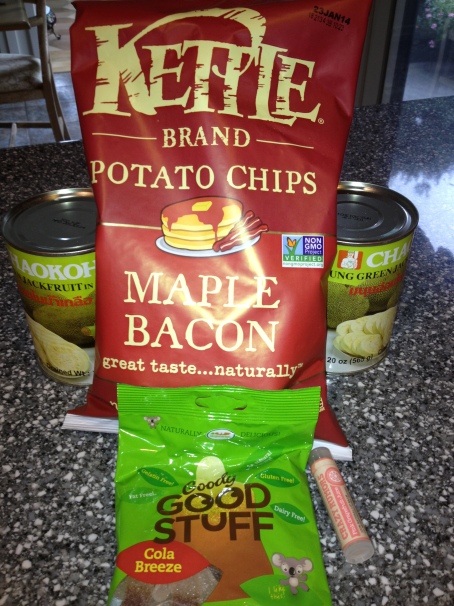
The other day I received a package of goodies I had bought myself from veganessentials.com and was a bit too excited. If you can’t tell, I ordered 2 cans of Jackfruit for some future culinary creations, Kettle Brand Maple Bacon flavored potato chips, cola flavored gummy candy by Goody Good Stuff, and a grapefruit flavored lip balm stick by Crazy Rumors.

Now, I was very hesitant to buy the potato chips because I’ve been hearing in vegnews how good they are, and I am trying to be good about not eating too much junk food and getting healthy. But I figured as long as I do not eat them every day or more than a single serving each day I will be fine. So far, I have been good about that.

My Review of Kettle Brand Maple Bacon Potato Chips:

Image

I was so excited to try an actually vegan flavor like this!

 Hmm, so I haven’t had many potato chips by this brand recently (or potato chips in general really!) but I really liked the thickness and crispy-crunchy texture of the actual chips. I was sort of disappointed with the flavor, as it is stronger on the maple notes and weaker on the smokey bacon flavor. I was hoping it would be a bit more balanced. However, they’re still delicious regardless. I give them a 4 good bananas, 1 bad rating!

Image

My Review of Goody Good Stuff Cola Breeze Gummies:

Image

1 serving of these babies!

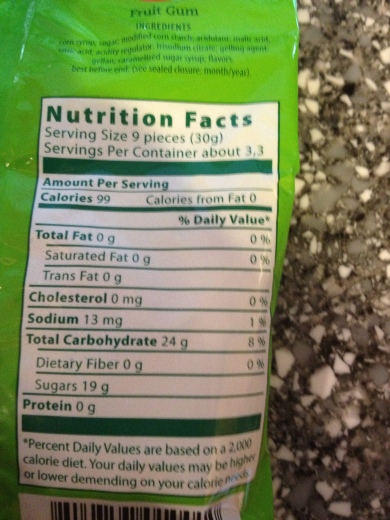
Well, first of all, these are not the junkiest junk food you could choose. 9 pieces of them are 99 calories, and they are truly fat free and with very low sodium. However, they’re basically just empty calories from sugar and the stuff they use to make them gummy. Basically they have zero nutritional value, but they’re definitely a nice treat!

Image

I also noticed a spelling error/typo (as I almost always do on things like these if there is one)…they wrote “demending” instead of “depending.” Anyhow, on to the review of the taste, which is probably what you are waiting for. I was a little disappointed because it has a very strong citrus flavor and a less strong cola flavor which I was really wanting. There is more of a subtle cola flavor. I still would rate it a very good for a number of reasons. First of all, it’s very tricky to find specialty candy like this that is vegan. I believe these are imported from Europe somewhere, so that somewhat illustrates how hard it is to find. Second, they have a great sour type flavor which I really like, and a great texture. I’m going to rate them 4 good bananas, 1 bad.

Image

This company, Goody Good Stuff, makes other types of gummy candies in different flavors, so if you’re interested in trying them, check out where I found them, in the candy section at veganessentials.com!

That’s all for today! I hope you enjoyed this post and that it helped you decide whether you should try these items or not.

Also, keep an eye out (next week perhaps) when I finally try the Jackfruit I bought. I’m going to try a recipe I have in the Bake and Destroy cookbook I have by Natalie Slater, review it, and then try to make my own creation after I understand a bit more how it works and what it tastes like! I’m excited for that!

Italian Chickpea Salad, tomato, and Daiya Provolone panini

Image

I was craving a chickpea salad sandwich but most of the recipes out there are all very similar–usually to make it taste sort of like a tuna sandwich–and I wanted something slightly different. So I had some vegan daiya provolone slices and tomatoes, and thought making an Italian flavored chickpea salad would be good. I decided to put it all in my panini press with some bread (duh). It came out really good, my only regret is that I didn’t put a slice of the provolone on both inside pieces of bread, because it would have helped the sandwich stick together better.

I made the chickpea salad in the food processor, and pulsed it to the point where it was the texture of a paté or thick hummus. I think it might be good if you process the sun dried tomatoes with the olive oil and spices and then add the chickpeas and roughly combine, especially if you want to eat it in a cold sandwich instead of a panini. Otherwise, just put everything in at once until combined.

Recipe:

For the Italian Chickpea Salad:

(Makes about four 1/4 cup servings, or one cup total when fully processed in the food processor)

Ingredients:

1-15 oz can of chickpeas/garbanzo beans, rinsed and drained of water

5 sun dried tomato halves (I used ones without oil)

2 1/2 tbsp olive oil

2 tbsp fresh Italian parsley, chopped

1 tbsp nutritional yeast (my favorite is Red Star brand)

2 tsp salt free Italian seasoning herb mix

1/2 tbsp dried minced onion

1/4 tsp garlic powder

1/4 tsp salt

1/4 tsp black pepper, ground

Instructions:

  1. If you want a smooth, thick, pasty salad, throw all the ingredients in a food processor and pulse until combined and/or desired texture is met.
  2. Otherwise, process sun dried tomatoes, oil and other dry ingredients except chickpeas until fully combined.
  3. Add in chickpeas and pulse until roughly chopped.

For the panini:

2 slices vegan bread of choice (Italian or ciabatta would be nice–I just used the only bread I had- Trader Joe’s Texas Toast)

2 Daiya Provolone slices (I found them at my local grocery-Stop and Shop, in the organic refrigerated section! I believe Whole Foods sells them, other grocery stores may be more difficult to find…I believe someone near me requested a lot of vegan stuff at my grocery store and they were a huge success so they are stocking a lot of awesome things now!)

2 tomato slices, fairly thin

Italian Chickpea Salad, recipe above

Instructions:

  1. It sort of depends on what kind of panini press/maker you have. (Mine does not require any additional spray or oil so that’s why I don’t mention it, but if yours does, please follow the directions and be safe.)  Heat whatever you have until ready.
  2. In the meantime, prepare the fixings.
  3. Place a slice of the cheese on each piece of bread.
  4. Spread the Chickpea Salad on one side.
  5. Place tomato slices on the same side as the Chickpea Salad.
  6. Place the other slice on top, cheese facing down, and press in the panini until golden brown.
  7. Mangia!

Here are links to the companies whose products I used in this recipe and a little review:

Daiya Vegan Cheese

4bananas

I’d give the daiya Provolone slices a 4 good banana, 1 bad rating.

It melts perfectly as do all their cheese slices, but the flavor isn’t exactly spot on.

Red Star Nutritional Yeast 

5bananas

I give their nutritional yeast a 5 good banana rating! It’s the best tasting Nutritional Yeast (also known as “Nooch”)  I’ve tried, and I can be quite picky with it.

See you later in the week for a cool new post about health with some awesome illustrations, and another cooking post! Until then…

Simple Vegan French Toast Recipe

Image

French Toast!

To be completely honest I really don’t like any of the vegan French Toast recipes that I have tried. They all call for chickpea (garbanzo) flour which can be difficult to get (never mind expensive!) and are kind of a pain in the but to make. 

Instead of chickpea flour, I have my own secret french toast ingredient. It’s arrowroot. Long ago when I was starting out as a vegan, I read in one of the punk rock diy cookbooks I had (It was either Soy! Not Oi! or Please Don’t Feed the Bears…if you are familiar with them both you might see why I get confused about which one’s which sometimes) that arrowroot was a great vegan pantry staple ingredient to always have on hand. Unfortunately, it can sometimes be tricky to find in large quantities. However, I buy it in a big bag from Bob’s Red Mill online. Arrowroot is a cornstarch substitute, but unlike cornstarch, supposedly it is more easily digested. Plus, thinking about the cornstarch and water mixture I used to love to play with as a kid going into my body scares me…that being said, if you want to make this delicious French Toast recipe right away and do not have arrowroot on hand, go ahead and use cornstarch. It’s a fairly small amount, and works exactly the same.

The recipe:

Delicious, Simple Vegan French Toast Recipe

Makes about 6 slices of bread (could be more or less depending on bread thickness and other factors)

Ingredients:

9 tbsp flour

2 tbsp arrowroot (or cornstarch)

1/2 tsp vanilla extract

2 tsp maple syrup

1 cup almond milk or other vegan milk of choice (I used sweetened vanilla almond breeze)

2 tbsp Vegan Margarine 

Vegan bread of choice (I used Trader Joe’s Texas Toast slices–they taste kind of like sweet bread and are really thick and delicious)

Directions:

  1. In a medium but shallow bowl or container, mix the powders together. 
  2. Add the liquid ingredients.
  3. Whisk together until it’s no longer clumpy. The thickness should be that of a typical french toast batter, but if you’ve never made french toast before, I’m not sure what to compare it to. You want it to be thick, but not the thickness of a pancake batter, but not too watery either. If the thickness doesn’t seem right, add 1/2 tbsp flour until you get the right texture.
  4. Heat a griddle or large frying pan on the stove on medium heat.
  5. Melt the vegan margarine.
  6. Once the margarine is melted, dip both sides of the bread in the batter and place on the griddle. Repeat until all the batter is used up or do like I did and save the batter for later by covering it and placing it in the fridge (you will need way less margarine if you only do 1 or a few slices).
  7. Cook on each side, at least two minutes each, but go by the way it looks, you want it to be crispy and golden with some brown spots.
  8. Voila! You can nom on it now! I put some maple syrup on top. Powdered sugar would also taste delicious!


Laura’s first ever original recipe: Baked “Honey” and Lavender Donuts!

Wow, so just yesterday I debuted this blog on the internet, and it’s already motivating me and inspiring my cooking in amazing ways!

I was in the mall after school and decided to purchase a donut pan and some lavender extract, two things that have been in my amazon wishlist for awhile, but haven’t bought yet because of my need for instant gratification…so there they were in my shopping bag, and my mind was going wild with different things I could do with both items together.

These donuts were born from the initial brainstorm:

Image

Baked “Honey” and Lavender Glazed Donuts!

I’ve never created my own recipe until now…I had to do lots of research on a basic donut recipe and then veganized it and tweaked that a bit…I wanted my donuts to have a lavender like color, but did not want to use artificial colors, so I added some smushed up blueberries to give it the color. I am not a fan of the taste of blueberries except for the occasional good muffin, but these I can barely taste the blueberries in, which is fine by me. The glaze was really tasty in my opinion, but I might try to find a more icing type of frosting to make next time because I think it’ll look nicer. My family who tried them also said the amount of lavender I put in the glaze was a bit overpowering, so I changed the recipe a bit.

Image

A cartoon I drew of my cat, Neko!

My cat Neko is a kindred scent spirit to me apparently, and shares my love of all things lavender. While the kitchen was scented with it’s essence, his nose was working hard trying to find the source of the smell, and he just hung out on the kitchen counter for a while looking quite relaxed.

Before I get to the recipe for these babies, I want to also share a review of what I use for the “honey.” It’s kind of awesome, because I don’t really like agave (I think it’s too much like high fructose syrup). It’s called Bee Free Honee and I think more vegans should try it! It’s made of apples and I can’t believe how close it comes to the taste of real honey from my memory of it. I give it:

Image

Okay, okay, here’s the recipe:

Baked “Honey” and Lavender Donuts

Image

time to make the donuts!

Makes 6 donuts

Ingredients:

1 flax egg (1 tbsp flaxmeal and 3 tbsp water, whisked–let sit for a bit)

1/2 tbsp apple cider vinegar

1/2 Cup Vanilla Almond Milk (sweetened or unsweetened is fine, I used sweetened)

1/2 cup blueberries

2 tbsp bee free honee or agave (or even maple syrup)

2 tbsp unsweetened applesauce

1/4 cup vegan sugar

1 tsp lavender extract (I got mine at Sur La Table…you can probably get it at any good specialty cooking store or even Amazon where I originally saw it. This is the brand I bought there)

3/4 tsp baking powder

1/8 tsp baking soda

1 1/3 cup unbleached all-purpose white flour

Glaze:

2 tbsp almond milk

a couple drops (if possible) of lavender extract

1 tsp vanilla extract

1 cup organic powdered sugar

Dried lavender flowers or vegan sprinkles, for garnish

Instructions:

  1. Preheat oven to 425 degrees F.
  2. Make flax egg, whisk, and set aside in a small bowl.
  3. In a measuring cup, pour the apple cider vinegar, and then fill up with the almond milk. Whisk and then set aside 5-10 minutes. This creates a vegan buttermilk substitute!
  4. Mash blueberries with a potato masher in a bowl, or roughly in a food processor or blender. You don’t want them to be too liquid, but enough so they’re smooth and no longer resemble berries.
  5. In a small mixing bowl, add flax egg, almond milk/apple cider vinegar mixture, “honey,” apple sauce, sugar, and lavender extract. Stir until combined.
  6. Mix baking soda, baking powder, and flour together in a large mixing bowl.
  7. Stir the powders and flour until combined and then add the wet ingredients into the bowl.
  8. Fold in the blueberries.
  9. Spray donut pan with cooking spray.
  10. Spoon donut batter into pan cavities.
  11. Put into the oven. Make sure you have the pan on top of a regular cookie sheet in case there’s any spill over for any reason!
  12. Bake in oven for 10-12 minutes. You want them to be somewhat of a golden color.
  13. Remove from oven and cool for 5 minutes.
  14. Place on a cooling rack to completely cool.

To make the glaze: 

  1. Heat almond milk with extracts in a small saucepan on low heat until warm, whisking occasionally so it doesn’t scorch.
  2. Slowly add powdered sugar and whisk until smooth.
  3. Dip donuts into glaze.
  4. Quickly add vegan sprinkles or dried lavender flowers before glaze sets!
  5. Om nom nom on them!

Some extra tips:

Image

blueberries

These are how my blueberries looked before I folded them in.

If you try the recipe, let me know how it goes! You can always contact me or comment about troubleshooting anything or getting some ideas how to tweak something (though I don’t guarantee they’ll work perfectly all the time). And if you make them for someone or something, or whatever, be sure to tell people where you found the recipe and about my blog 🙂 !!!