Gluten Free, Vegan Thanksgiving Lasagna

IMG_0574.JPG

Hey, I’ve been having a rough time lately. I’m aware I have not been posting much. I finally made an original recipe to share with you all.

I came up with this idea for Thanksgiving because it’s easy to transport for a long car ride, easy to reheat, and has a little bit of everything. Also, since I cannot eat the vegan Thanksgiving roasts like Tofurky and such because they’re made out of pure gluten, I figured this would be even more delicious and satisfying for me.

This recipe contains butternut squash, kale, walnuts, caramelized onions, and vegan ricotta, as well as gluten-free lasagna noodles.

It uses two packages of Kite Hill ricotta, which is a pretty big splurge but so worth it if you can get it. If you can’t, it works with some firm tofu, or you can make a cashew ricotta too.

Here it is:

Ingredients:

  • 4 cups chopped butternut squash
  • 4 tbsp extra virgin olive oil, divided
  • 4 small Vidalia onions, cut into rings
  • 1 tbsp brown sugar
  • ¾ cup vegetable broth
  • ½ tsp salt
  • ¼ tsp pepper
  • ½ tsp ground nutmeg
  • 1 clove minced garlic
  • ¼ cup nutritional yeast
  • 16 oz chopped kale
  • 3 cups water
  • 1 ½ cup walnuts
  • 2 packages Kite Hill ricotta cheese
  • ½ cup non dairy milk of choice
  • 1 package Tinkyada Brown Rice Lasagne Noodles (the best gluten free pasta brand, in my opinion, and I’ve tried a lot)


Directions:

  1. Place butternut squash in a large saucepan and cover with water.
  2. When water is boiling, set a timer for 15-20 minutes. Remove from heat when the squash is soft.
  3. While the butternut squash is boiling, prepare the caramelized onions. Place 2 tablespoons olive oil in a large frying pan with a cover. Toss the onions in the oil. Keep on medium heat (you may have to lower it later) for 10-15 minutes, stirring every so often. When browned, add in the brown sugar, stir, and remove from heat. Set aside for assembly of the lasagna later.
  4. When the squash is cooked, drain the water and place back into the pot. Mash the squash with a potato masher until smooth.
  5. Stir in the vegetable broth, salt and pepper, nutmeg, garlic, and nutritional yeast.
  6. Prepare the kale by boiling three cups of water in a large covered pot. When boiling, add the kale and cover. Stir every so often until all the kale is wilted, for about 5 minutes.
  7. Prepare the walnuts by placing them in a food processor and blend until pasty. If you like, you can add some additional seasonings to the walnuts before blending.
  8. Prepare the lasagna noodles according to the packaged directions and preheat the oven to 350 degrees F.
  9. Combine the ricotta with the nondairy milk in a medium sized bowl.
  10. Drizzle the remaining two tablespoons of olive oil onto a large casserole or lasagna pan.
  11. Place a layer of noodles on the bottom, followed by half the butternut sauce, half the ricotta, half the walnuts, and all of the kale. Repeat in the same order except this time, place on top with the onions instead of the kale for the second layer.
  12. Cover pan with foil and cook for 30 minutes. Uncover and heat for an additional ten minutes (or less depending on how it’s looking)
  13. Allow it to cool slightly before digging in.

img_0584

I hope you have a lot to be grateful for!


Adventures in Ethiopian Cooking

Over the holidays, I got a vegan Ethiopian cookbook, Teff Love, by Kittee Berns, for a present.

IMG_7616


I have loved Ethiopian cuisine since I lived in the Boston area, where I used to go to a restaurant in Cambridge, MA called Addi’s Red Sea. It is a very vegan friendly cuisine. Vegnews recently shared a story that has more about Ethiopian culture and their food and why it’s so vegan-friendly. Check it out here.

At first I only had the time and energy to try the Ethiopian style tofu scramble recipe. I’m pretty sure I could eat that almost every day for the rest of my life and not get sick of it. What really makes it is the berbere spice, the signature spice mix for the cuisine…although I’m a baby when it comes to spice and so I reduce it by quite a bit.

IMG_7443

You can get it in the international section of Whole Foods, among other places, I am sure.

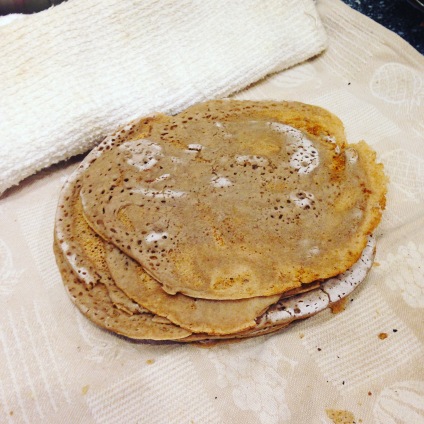
One of the best parts of the food is the Injera, the spongy, crepe-like sourdough bread that you eat everything with. It can be used instead of utensils. It’s naturally gluten free (made from teff flour–which inspired the name of Bern’s cookbook). However, it takes up to a week to fully make, which is a bit complicated…but worth it if you can figure it out. If you are pressed for time though, the book has a teff crepe recipe which is really awesome as well.

IMG_7439

Another great aspect of Ethiopian food is that it makes a lot of food, and it lends itself to making multiple dishes and feeding lots of people.

For example, the first time I made it, I gave some to my friend who had just had a baby as part of a meal train.

Here’s a picture she took of her plate:

IMG_7473

And here is one of my favorite pictures of my own plate (one of many):

IMG_7455 (1)

Also, my dad happens to work with someone from Ethiopia, who ended up giving me a huge jar of Teff flour! It was very exciting as it’s like hitting the teff jackpot!

IMG_7508

After making a large batch of food for myself and my friend and her family, I made a dish by itself. It is called ye’zelbo gomen be’karot, which is kale with carrots, onions and mild spices. It’s seriously the best kale dish I’ve ever eaten, and that is saying a lot (I love kale) and my whole family loves it.

Speaking of which: yesterday (Wednesday April 7), after spending the weekend in my kitchen making a big feast for Monday, only to have snow (!!!) cancel the class, I served the small college program, College Unbound, who helped me get my bachelor’s degree, the feast as well! I kept raving about the kale dish to everyone, and one student said she doesn’t like kale, but I got her to try it anyways, and she really liked it! Her cousin who was also there, was claiming she might need to contact the local news channel because I had her trying foods she’d never tried before, and she’s usually so picky…which was a big compliment for myself and the author of the cookbook! Here are a few pictures of some of the other students posing with their plates:

Also, the majority of the students had never had Ethiopian food before when we asked. Most people who tried it were not put off by the fact that there wasn’t meat in the dishes, which can happen sometimes when I am feeding large groups (or at least they didn’t say it to my face! haha). I had one person comment to me that the split peas in mild sauce (called ye’ater kik alicha in the book) had a meatlike texture. My friend Domingo, who is pictured in the first picture above, was excited also that I made the vegan Ethiopian style mac and cheesie, because he’s lactose intolerant.

It was a really positive experience for myself and all involved. Especially because I could effortlessly share my love of another culture’s food and share that vegan food doesn’t have to be bland, boring, or leave you craving protein (in fact, the red lentils in spicy sauce, in a dish called ye’misser wot, have 15g of protein per serving, according to Teff Love!). I hope to do it again soon.

And I can’t recommend the cookbook Teff Love, enough!

Asparagus and Saffron and Garlic Aioli

When I was younger, my mom used to make a non vegan version of this that I loved. Every time she’d make it, she would say “Saffron and Garlic Aioliiiiii” all long and drawn out in a funny voice and it made me have fonder memories of it. It leaves you with horrible garlic breath, but is worth it.

IMG_6847

Ingredients:

  • 1 bunch fresh asparagus
  • Olive oil or spray oil
  • 1 cup Just Mayo (vegan mayo brand…I do not recommend trying this with other brands of veganaise, they will get too thin and the taste won’t be the same)
  • 2 cloves garlic, minced
  • 1 tablespoon agave
  • 1/4 cup red wine vinegar
  • 1 pinch saffron threads

Directions:

  1. Preheat oven to 425 degrees F.
  2. Trim the ends of the asparagus off. Place in a baking pan with oil spread or sprayed on the bottom. Spray the tops of the asparagus with oil as well or use a couple teaspoons of oil if you don’t spray.
  3. Bake for 15 minutes.
  4. To prepare the aioli, place the vinegar, agave, and saffron in a saucepan and bring it to a boil on medium heat.
  5. Allow the vinegar to cool in the refrigerator.
  6. Stir the garlic together with the Just Mayo.
  7. When the vinegar mixture is cool, mix together with the mayo and garlic.
  8. Dollop the aioli over the asparagus. Enjoy! It also makes a yummy dip for other veggies and such.

IMG_6845


Mango Cashew Thai Yellow Curry

Tonight I made this really good dinner for my brother and I! He said it tasted like it was from a restaurant. It was surprisingly easy though. I had bought this curry paste, pictured below, at Market Basket:

IMG_4485

Which eventually became this:

IMG_4482

Note: the curry paste is not mild in spiciness. 

Ingredients:

  • 1 can organic full fat coconut milk
  • 1 package Kanokwan yellow curry paste
  • 1 lb extra firm tofu, cubed
  • 1 cup vegetable broth
  • 14 oz chopped stir fry veggies of choice
  • 1 champagne mango, cut into chunks
  • 1/2 cup raw cashews
  • Cooked rice, for serving

Directions:

  1. Mix together the full can of coconut milk and curry paste. Heat on medium low heat and stir until oily on top.
  2. Add in cubed tofu. Stir and allow to cook for a few minutes.
  3. Pour in vegetable broth and stir. Increase heat to medium, and add veggies, mango, and cashews.
  4. Heat until veggies are cooked.
  5. Serve over rice.
  6. Deliciously simple!

Tomorrow is the Summer Solstice and Father’s Day! I wish it wasn’t supposed to rain…:(

Vegan Mofo 2014: Friday Pie Day: Basic Veggie Pot Pie

Hi there,

I originally fell in love with vegan pot pies after trying to follow this recipe, which was originally on vegweb. However, it inspired me to create my own pie crust recipe, because prepared vegan pie crusts are a pain to find. Also, since so much of the recipe just says “to taste” it’s hard to find the right amounts to make it feasible. I have experimented with all kinds of fillings, but this is my favorite combination (much of which isn’t really on the original recipe). I also have more or less figured out a good proportion for the broth, cornstarch and water, and almond milk but please note that it can vary depending on how big or small the vegetables are.

photo (2)

Basic Vegan Veggie Pot Pie Recipe:

Ingredients:

For the crust:

  • 1 cup whole wheat pastry flour
  • 1 cup unbleached white flour
  • 1 tsp salt
  • 6 tbsp cold Earth Balance
  • 6 tbsp non-hydrogenated organic vegetable shortening
  • 1/4 cup cold water

For the filling:

  • Cauliflower- 1 cup steamed
  • 1/2-1 cup mushrooms, sautéed until the juices are released
  • 1 zucchini steamed
  • 1 yellow squash steamed
  • 1 onion, sautéed for about 3 minutes with a bit of oil
  • 2 tbsp cornstarch
  • 4 tbsp water
  • 1 cup veggie broth
  • 1 cup almond milk
  • 1 tsp garlic powder
  • 1/4 tsp cumin
  • 1/2 tsp thyme
  • 1/4 tsp ground sage
  • 4 daiya cheddar slices or 1/2 cup daiya shredded cheddar

Directions:

For the pie crust:

  1. Place flours and salt in a food processor. Give it a quick whir to combine together.
  2. Add 2 tbsp of shortening, quickly pulse, and continue to add the shortening 2 tbsp at a time until you’ve put in 6 tbsp.
  3. Follow the same method with the earth balance as above.
  4. With the processor running, open the little opening thing on top and slowly pour in the water.
  5. Separate the dough into fairly equal halves.
  6. Smoosh into two round disk shapes, and wrap each in plastic wrap.
  7. Refrigerate for at least 15 minutes to 2 hours.

For the rest of the pie:

  1. Preheat oven to 400 degrees F.
  2. Take out the crust disks from the fridge to soften up a bit depending on how long you placed them in the fridge. If you only placed it in for 15 minutes then just take it out right before you want to use it.
  3. Prepare the vegetables accordingly. Once each is cooked place in a large bowl.
  4. Once the oven is heated, roll out one disk of the dough on a flat surface over plastic wrap into a thin circular shape (it’s okay if it’s not perfect) and place over a pie dish. Mould to the sides of the dish, place some slits with a knife into the bottom of the dough, and bake for 5-7 minutes so it isn’t as soft as it was before. Set aside.
  5. Prepare the broth/gravy.  Mix together the cornstarch and water in a small bowl or cup. Set aside and boil together the veggie broth and almond milk and herbs and spices. When hot, add in the cornstarch and water mixture and whisk until this all starts to boil and thicken. Pour over the vegetables in the bowl you set aside and stir to combine.
  6. Place the Daiya cheddar in the bottom crust.
  7. Place the veggie and gravy filling inside the crust.
  8. Repeat the steps you used to roll out the bottom crust and place on top, pinching the sides together. Design a cute decoration out of the slits you cut for ventilation.
  9. I find it a good idea to place a baking dish under the pie before baking in case things ooze out.
  10. Bake for 35-40 minutes, checking after 30 minutes to ensure the crust isn’t burning in your oven. If you think you need more time to bake it but the crust is starting to brown around the edges, you can wrap foil around those edges and it will help with that problem.

OLYMPUS DIGITAL CAMERA

Made with love!

OLYMPUS DIGITAL CAMERA

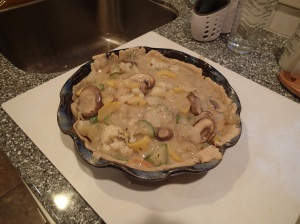
The filling before it was baked

850X315_g3_fb-1

Happy Friday, everyone!!

Vegan MoFo 2014: Day 6! Jackfruit Chick’un Noodle Crockpot Soup!

Saturdays are Soup, Salad, and Sandwich days! Here’s the first entry for a soup recipe!

This soup is the perfect sick day soup. The jackfruit shreds in the soup just like I vaguely remember the real deal to be like. You can add vegan oyster crackers and some nutritional yeast flakes into the soup like I did if you wish. It’s made in the crockpot to make it less time consuming and easier. It takes 6-7 hours to finish, so make sure you time it appropriately.

photo 1 (5)

Ingredients:

  • 1 can young green jackfruit in brine, drained and rinsed, chopped slightly
  • 3 stalks celery, chopped
  • 10 baby carrots cut into thirds
  • 1 large onion cut into rings
  • 3 tbsp olive oil
  • 1 tsp garlic powder
  • 1/4 tsp turmeric
  • Salt and pepper to taste (I used 1/2 tsp salt and 1/4 tsp ground black pepper)
  • 1/2 tsp dried rosemary crushed between fingers
  • 1/4 tsp celery seed
  • 2 tsp dried parsley
  • 4 cups veggie broth
  • 2 cups water
  • 5-6 sprigs worth of leaves from fresh thyme
  • 1/2 lb noodles of choice (I used spiral noodles)
  • Vegan oyster crackers or saltines (as a side or to stir into the soup)
  • Nutritional yeast (optional)

Directions:

  1. Place jackfruit, celery, carrots, and onions in bottom of crockpot.
  2. Pour olive oil on top and stir.
  3. Add all the spices and herbs except for the thyme and mix with a spoon to coat the veggies.
  4. Add broth and water.
  5. Add thyme leaves and give it a good stir.
  6. Turn the crockpot to low and simmer for 6-7 hours. Go about your business until then.
  7. When your soup is pretty much all ready, add the noodles and turn the crockpot to high heat, let it cook for about 10-15 minutes until the noodles are tender.
  8. Turn the crockpot off, taste and adjust seasonings if desired.
  9. Serve the soup in big soup bowls with saltines or oyster crackers, with some nutritional yeast sprinkled on top if desired.
  10. You can easily freeze this in a big container for when you get sick or want it in the dead of winter but don’t feel like cooking…just defrost and reboil or even place back into the crockpot until it’s boiling on high…

Enjoy! Hope everyone’s Vegan MoFo 2014 is going well! Thank you for commenting and being so kind. I try to look at other people’s blogs who are participating but I just started going to school full time and so I don’t have the most time to do that/remember. But I hope to be able to keep discovering more blogs that I like when I do have time! 

Vegan MoFo Day 5! Friday! Pie day (and pizza day next Friday!) Broccoli, Cheese, and tempeh bacon pot pie!

So I realize Friday’s theme might be a little confusing, but it’s pizza and pie day, but the pie recipes rotate along with pizza recipes. The pies are pot pies that you’d eat for a meal, not desserts.

photo 1 (4)

Here is the first one:

Broccoli, Tempeh Bacon, and Cheese (nutritional yeast based) Pot Pie:

I had originally made this for a pot pie day at Girls Rock RI’s volunteer lunch during the camp this Summer, and it was a big hit! I made it again to make sure I had it down pat (and because I hadn’t even tried it during the camp), and it’s really good! 

The broccoli and cheese is obviously a delicious combination, but the smoky tempeh bacon gives it extra protein and complements the flavors so well!

Ingredients:

For the pie crust:

  • 1 cup whole wheat pastry flour
  • 1 cup unbleached white flour
  • 1 tsp salt
  • 6 tbsp cold Earth Balance
  • 6 tbsp non-hydrogenated organic vegetable shortening
  • 1/4 cup cold water

 For the cheese sauce:

  • 1 tbsp vegan margarine (I use Earth Balance)
  • 1 cups unsweetened almond milk
  • 1/8 cup whole wheat pastry flour (or substitute gluten free flour)
  • 3/4 cups nutritional yeast
  • 1 slice Daiya cheddar cheese (what I used) or 1/4 cup Daiya cheddar shreds
  • 1/2 tsp sea salt
  • 1/2 tsp onion powder
  • 1/4 tsp paprika
  • 1/4 tsp turmeric
  • 1/2 tbsp prepared yellow mustard

For the pie filling:

  • About 2 cups steamed broccoli
  • 8 strips prepared tempeh bacon cooked in 1 tbsp coconut oil

Directions:

Pie Crust:

  1. Place flours and salt in a food processor. Give it a quick whir to combine together.
  2. Add 2 tbsp of shortening, quickly pulse, and continue to add the shortening 2 tbsp at a time until you’ve put in 6 tbsp.
  3. Follow the same method with the Earth Balance as above.
  4. With the processor running, open the little opening thing on top and slowly pour in the water.
  5. Separate the dough into fairly equal halves.
  6. Smoosh into two round disk shapes, and wrap each in plastic wrap.
  7. Refrigerate for at least 15 minutes to 2 hours.

To make the pot pie:

  1. Preheat your oven to 400 degrees F.
  2. Roll out one of the dough disks into a thin circle on top of plastic wrap and with flour dusted onto the rolling pin.
  3. Carefully lift the dough while still on the plastic wrap onto a pie pan. Fold over the edges.
  4. Bake in the oven for five minutes. Take out and allow to cool while you prepare the rest.
  5. Steam broccoli in a steamer basket until bright green. Set aside in a bowl.
  6. Cook about 8 strips of tempeh bacon (I used Tofurky brand) with coconut oil in a frying pan until browned on both sides.
  7. Place on the bottom of the pie crust so that it covers the bottom of the crust.
  8. Make the cheese sauce: on medium heat, melt the earth balance in the almond milk. Turn to low heat. Add the flour and stir. Add the nutritional yeast and stir. Add the slice of daiya and allow to melt, while, you guessed it, stirring. Turn off the heat and stir in the rest of the ingredients.
  9. Mix this sauce in with the broccoli and scoop into the bottom pie crust.
  10. Roll out the other half of the dough as you did before, only this time placing the dough on top of the pie and closing the edges together.
  11. Cut slits or a design out of the middle.
  12. Bake for 30-35 minutes.
  13. Allow to cool 5 minutes, slice, and enjoy.

photo 2 (5)

Yay! 


Playing a bit of catch up-tofu, hibachi, gyros, and taco salad

I have been a bit missing in action lately. Sorry!

Next weekend I am playing food Coordinator again at the Ladies Rock camp through Girls Rock RI so that will be super fun, but I will also be super busy.

Here is what  I’ve been cooking up!

photo 3 (2)This is what I made for breakfast today. It was the Curry Scrambled Tofu with Cabbage and Caraway from the Vegan Brunch Cookbook by Isa Chandra Moscowitz. My kitchen still smells absolutely amazing from cooking it, and it’s now 3:30pm (I got up at 8 to cook it). Yay. Also, I love that it’s a fusion of Russian and Indian food together, which are two cuisines I would not think to pair together but love individually. They work together too, to my surprise. I always reduce the salt when I cook by a lot…I am not a fan of it and try to cook without it when possible. I did not always do that, though.

photo 2 (2)I made vegan hibachi vegetables with a vegan version of my favorite Japanese dipping sauce (called “yum yum sauce” on recipe sites). Basically for the veggies you just cut 4 zucchini into bite size pieces and 1 1/2 white or yellow onions and stir fry it with 2 tbsp Earth Balance and 4 tbsp soy sauce until cooked thoroughly (I think 5-8 minutes?). For the mushrooms just chop them and cook them in 1 tbsp Earth  Balance and 1 tbsp soy sauce. For the Yum Yum sauce I used this recipe  and made vegan substitutions with vegenaise and Earth Balance and used a bit less water (or you can just add more vegenaise after and stir it up to make it thicker like I did). It’ll need to rest overnight before you eat it so the flavors set.

photo 1 (2)

Tempeh Gyros with tofu Tzatziki! From this recipe! They were so good and quite healthy! The Tzatziki is made with silken tofu and you can’t even tell it’s not made with yogurt of some type. The only thing I realized is that there is an error in the recipe and they do not tell you what to do with the cucumbers they allude to later (like how much to use and how to cut them up) so I just omitted them and put sliced cucumbers into the sandwich.

photo 1 (1)

I used the recipe from the Eat To Live Cookbook for the taco salad. It’s really healthy, but could use some kind of improvement in flavor I think that I cannot quite pinpoint. Maybe some more spices or some cherry tomatoes, I do not know! It has corn, black beans, red onion, red and green bell pepper, and a “guacamole” dressing.

That’s all for now! For dinner tonight I am making the Bacon Cheeseburger Pie from Betty Goes Vegan, so I will let you all know how that goes sometime soon!

Salad of the Week! Burrito Explosion Salad!

It’s a good thing I was craving burritos when I planned this salad. I think this is my favorite salad creation so far!

Image

Since I usually cook a fair amount of food each week, and have a salad every day, I’m somewhat lazy when it comes to making the ingredients of this salad. Most of them were store bought or really easy.  If you want to, I’d recommend making a mango salsa and maybe the tortilla crisps on your own. I was able to find both these pre-made and vegan very easily, so I didn’t see the point, but that’s just me.

First, you need to make the dressing. I used the recipe for The Healthy Librarian’s Creamy Chipotle Dressing in this list of oil-free or low oil dressings online. I did add a ton more extra nutritional yeast to the recipe (I think like 3-4 more tablespoons?) and ended up adding a tbsp of water because that thickens it up a lot.

Then, you make the salad.

I use:

photo (49)

2 cups lettuce

1/2 cup black beans

1/4 an avocado, chopped

4 tbsp crunchy tortilla strips

5 tbsp mango salsa

and 4 tbsp of the dressing

According to my calculations this salad is 348 calories with the ingredients I use, so that’s the perfect healthy lunch for me! It seems like a really luxurious and fattening salad, but really isn’t, as most of the fat is the healthy kind!

See you tomorrow for the recap of all my cooking adventures in Food Porn Friday!

Vegan Salad of the week: Vegan Mediterranean “Chicken” Salad with vegan Caesar dressing

Okay, so I’m setting a goal again to eat a large salad for one meal a day as part of my health goals. This easily helps me get enough (or more than enough) servings of veggies daily, and keeps my caloric intake for trying to lose weight easier to manage.

I’ve been experimenting with healthy salad dressings and somewhere down the line someone clued me into this online list of oil free dressings: here. I’m going to experiment with salads based on some of these dressing recipes in the next couple of weeks.

At first when I started making salads, I would stick as many vegetables in it as I could but it took me about 45 minutes to chop everything myself, and was sometimes difficult to force myself to eat with full servings or more of cucumber slices, carrots, etc. It would take me an hour or longer to chew everything, as well, haha. So eventually I reduced the amount of vegetables and went for easier salads.

My favorite salad for the longest time was 2 cups of lettuce, 3-4 sliced sweet gherkin pickles, 4 sliced pickled beets chopped up even smaller, a baked boca “chicken” patty, 1/8 cup raw almonds, and this dressing. But eventually I ate that salad so many times that I’m probably not going to eat it any time soon!

So that’s what lead me to decide to try and invent a new salad every week! Here’s this week’s creation.

Image

First I made the Caesar dressing from Sexy Tofu, except I added 2 extra tbsp of nutritional yeast because I’m having difficulty meeting my b-12 intake without extra nooch. I try to add more whenever I can, and I don’t think it made it taste bad or anything, it’s still super delicious.

Image

I’m posing with the croutons while being photographed making the salad, haha

I was going to make my own croutons, but in my search for a good vegan bread to make them out of I got discouraged and also was hungry and planning to make the salad for my next meal, so I gave up and bought some Mediterranean herb flavored croutons that happen to be vegan. I got them from a local grocery store called East Side Market in Providence, it seems to have a good selection of kosher and middle eastern type foods, I think this is why they carry them and that they’re vegan too. They’re actually a product of Israel. They have a distinct taste, are a great, crunchy texture and the spices really give it that distinct kind of Mediterranean taste. I put 4 tbsp of the croutons (they’re very small making it possible to fit them in a tablespoon easily) in the salad.

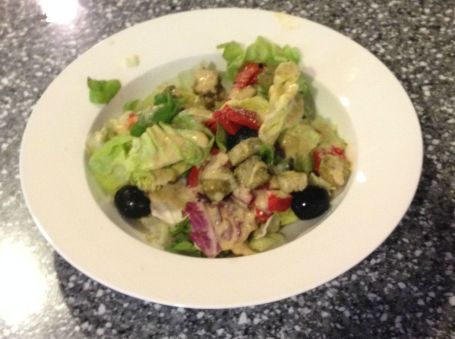
Basically, the salad is:

2 cups chopped lettuce

2 tbsp of the caesar dressing

4 tbsp mini Mediterranean herbed croutons (if you can’t find this style of crouton, it’d be awesome to make your own croutons, and it’s really easy and delicious. All you do is take a half a loaf of bread of your choice–rye or pumpernickel or a mix works really well, or any bread that isn’t really soft–Cut it up into small chunks, stick in a plastic bag, drizzle some olive oil into the bag, shake to coat the bread with oil, add whatever herbs and spices you like, shake the bag of bread and oil again to coat, and stick in a 275 degree oven, checking every 15 mins until the croutons are completely crunchy!)

1 roasted red pepper chopped small

8 whole black olives

Fake chicken of some type. I bet beyond meat would be really good. I just use a baked boca chicken patty that I cut up small

1/2 tsp vegan parmesan (Okay, so you can make your own in various recipes found in cookbooks and online but I really doubt any of those will taste as parmesan-y as Galaxy Food’s Go Veggie Vegan alternative. I don’t know how they do it but it really does have that sharp parmesan flavor. It’s also a really fine texture which I believe would be difficult to duplicate on your own. But yeah, if you’ve found a good homemade version, let me know! Here’s what it looks like:

Image

make sure you see the yellow “vegan” text in the right hand corner, because I believe they do make other kinds that are dairy free but not vegan

So that’s my salad I’m eating for this week.

Stay tuned next week to see what new salad creation I come up with. It’ll probably get posted on Monday or Wednesday, but I’m not completely sure yet.