Vegan MoFo 2017 Day 19: Minimalist White Chocolate Fudge

Today’s theme is Minimalist (5 ingredients or less!) vegan recipes. May I present vegan white chocolate fudge fit for a unicorn! This stuff is really good, and it’s almost as hard to find vegan white chocolate as it is to find a unicorn, so it seems fitting. I usually get culinary cocoa butter online, but I believe places such as Whole Foods sell it in the nutritional supplement/superfoods section. Just be sure you’re buying food grade and not cosmetic grade as I believe there is a big difference between the two! 

unicorn fudge 2 of 2

Here is the recipe:

Ingredients:

  • 3 cups cocoa butter (I used a brand that was recommended by Food Empowerment Project)
  • 1 can sweetened condensed coconut milk
  • 2 cups organic powdered sugar
  • 1 tsp vanilla extract
  • Toppings of choice such as Dandies Mini Marshmallows, a variety of freeze dried fruit slices, crushed up cookies or candy, sprinkles, etc. I used Sweet and Sara’s rainbow cereal marshmallows I got before they announced their closure.

Directions:

  1. Melt the cocoa butter and condensed coconut milk until all the cocoa butter bits are liquified. It will become a bit of a golden brown liquid, that’s okay.
  2. Slowly stir in one-half cup of the powdered sugar at a time until smooth and no longer clumpy. Unicorns don’t like clumps.
  3. Grease an 8×8” pan and spray the bottom and sides with a nonstick spray. You may also want to line it with parchment paper to make it easier to remove from the pan later.
  4. Pour the liquid fudge into the pan. Spread the toppings across the shiny surface. They should float to the top like a mermaid who has come to the surface of the ocean.
  5. Make sure the top is pleasing to the eye, cover, and place into the fridge for at least 2 hours or overnight until set.
  6. Slice into cubes and serve.
  7. Store in the fridge in an airtight container for up to two weeks.

unicorn fudge 1 of 2

Vegan MoFo 2017 Day 10: Cookie Cutters

IMG_5241

Cookie cutters are an important tool for making food worthy of unicorns.

Today I will share three cookie cutters I have collected so far and the pros and cons of each.

IMG_5243

This one is my favorite unicorn cookie cutter because it is the most user-friendly unicorn cookie cutter I have found.  The unicorn’s horn isn’t too thin and/or long so that it will be difficult to keep intact when making cookies and the like, and it has a cute cartoony style. I bought this on Etsy, but I have seen it being sold on other sites, like Sweetapolita.com.

IMG_5246

This one is nice because it looks a little more detailed. However, it has thinner limbs and horn, which may make it more difficult to use when making cookies. I love the purple color. I bought this one at Michael’s craft store.

IMG_5245

This one is my least favorite for several reasons. One, it is plastic which I try to avoid whenever possible. However, I impulsively bought it because it also came with a rainbow cloud cookie cutter, and I liked that it was a profile of a unicorn’s head rather than the whole body. I wish though that the horn was a little more pronounced from the ears. I’ve used it and the horn isn’t prominent enough for it to be clear that it’s a unicorn and not a horse with three ears or something.

Remember my critiques of these cookie cutters when searching for your own cookie cutters. Some of the principles, such as not having super thin limbs or appendages on the design of the cutter apply to all cookie cutters of any shape or character. Also, I have found that with other types of cookie cutters, you want to make sure there are not too many pieces being cut out or leaving thin areas around the cut-out, as this often compromises the integrity of cookies. For example, I once was working with a bicycle cookie cutter that had handlebars with tiny little spaces to be cut out near the wheels. It was so frustrating to use. Maybe some objects and designs just don’t lend themselves that well to make cookies out of, but really I would hope you could make a cookie version of anything your heart desires if only you can find the right cookie cutter! ❤

Vegan MoFo 2017 Week 2, Day 9: Behind the Scenes: Unicorn Must-Haves

Hello, Fluffy the Vegan Unicorn is here!

This week’s MoFo theme is “Behind the Scenes.” This means you’ll be getting tips, tricks, tools, and must-haves, as well as some sneak peeks at the idea for the book Laura is writing with me.

Today we are looking at some of the must-haves for a magical unicorn-inspired kitchen. Some of these things we will be going into more detail later in the week. Those items will be starred.

IMG_4953

Here’s a photo of my “unicorn poop” sugar cookies…

Natural vegan food coloring. Whether it is the from the powders and recipes I talk about here, or storebought colors such as India Tree, Color Kitchen, or TruColor.

Cocoa Butter. This is used to make various vegan white chocolate recipes, some of which will be shared at a later date through this MoFo. I will only buy cocoa butter by brands recommended by Food Empowerment Project, or are fair trade and sourced outside Africa, since F.E.P. seems to be more about ready-to-eat chocolate rather than raw ingredients like Cocoa Butter. I do need to research this topic a bit more to be more clear on the matter.

Marshmallows. Let’s all take a moment of silence for Sweet and Sara Vegan Marshmallows getting ready to close…………..Okay. So, unfortunately, we won’t have dried rainbow-colored cereal marshmallows for much longer 😦 but we will have Dandies and Trader Joe’s vegan marshmallows. Dandies make special edition flavors sometimes which are really good and has good mini marshmallows that you can use for lots of Unicorn-friendly recipes. If you can only find the large pillowy vegan mallows near you, you can always cut them smaller for certain recipes that need mini mallows.

Vegan Sprinkles.* More on this in its own post, due Wednesday, October 11. All different kinds. And colored sanding sugar.

Unicorn shaped cookie cutters.* How else will you make unicorn shapes? More on these tomorrow.

Lots of sugar. This is self-explanatory. Make sure it’s always organic/vegan.

There’s probably a lot more I should mention, but this is a good start of the basics for now.


Vegan MoFo 2017 Day 7: Dessert!

EPSON MFP image

As the first week begins to come to a close, I, Fluffy the Vegan Unicorn want to remind you that there’s no need to shame yourself or others for indulging in vegan desserts.

In fact, I had Laura whip up this drawing so you could see a sampling of my favorite desserts and my favorite types of vegan sugar you can use in them.

And here are some more of my favorite desserts not listed on the pyramid:

Marshmallows

Chocolate

Marzipan

Cotton candy

Bubblegum

Gelatin-free gummy candy

Fudge

Frosting

Macarons

Pie

Pastry

Aquafaba meringues

Tell me, what is your favorite vegan, unicorn worthy dessert?


The most perfect gluten free vegan chocolate chip cookies

IMG_1994

I basically honed my baking skills as a kid by making chocolate chip cookies from an alphabet cookbook for kids. It was the only recipe I used, and they always came out perfect. I thought my mom had thrown out the cookbook, but I recently found it and I had to veganize them and make them gluten free. The result was so perfect I was astonished!

Here it is:

Ingredients:

  • 1/2 cup white vegan sugar
  • 1/2 cup organic brown sugar
  • 2/3 cup melted Earth Balance or refined coconut oil
  • 1 tbsp flaxmeal
  • 3 tbsp warm water
  • 1/2 tsp baking soda
  • 1 1/2 cup Bob’s Red Mill All Purpose Flour
  • 6 oz vegan chocolate chips

Directions:

  1. Preheat oven to 375 degrees F.
  2. Whisk flaxmeal with water in a small cup. Let sit and whisk several times until gelled.
  3. Mix together the sugars, melted Earth Balance or coconut oil, and flax egg.
  4. Stir in flour and baking soda.
  5. Add in chocolate chips.
  6. Form dough into small balls and place onto an ungreased cookie sheet. The recipe should make about 24 cookies.
  7. Bake for 10-12 minutes.
  8. Let cool and place on a cooling rack shortly after they come out of the oven.
  9. Enjoy ! I know I will!

IMG_1996


Holiday Recap and a Soy Curl Potpie Recipe

I’ve been so busy lately. Between graduate school, taking an improv comedy class, the holidays, my grandmother dying, etc., I’ve barely had time for cooking. I was able to create two Youtube videos in the beginning of the semester, which you can see here: https://www.youtube.com/channel/UCIGj10TPGenVBNH6vySDPpw! I hope to make more videos on Youtube in the coming year.

I’ve also been regularly updating my blog’s new(ish) Instagram account, which you can follow @bananacurlvegangirl

If you’re not on Instagram or following along here, I’m going to do a quick photo recap of some of the food I made for the holidays.

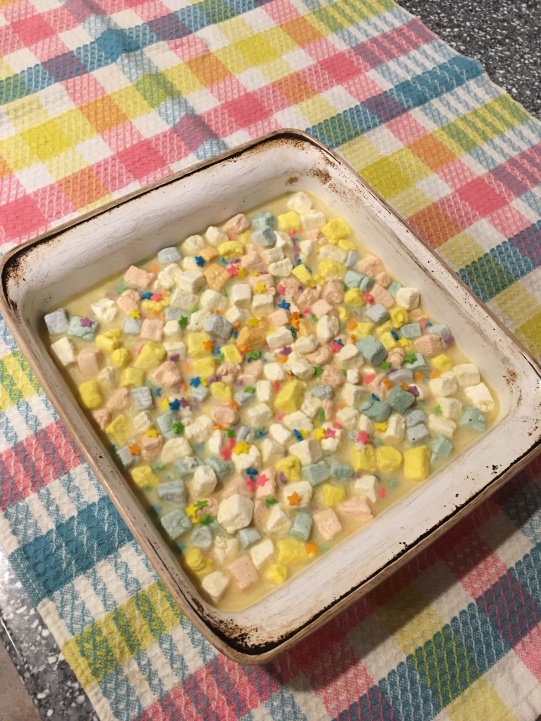
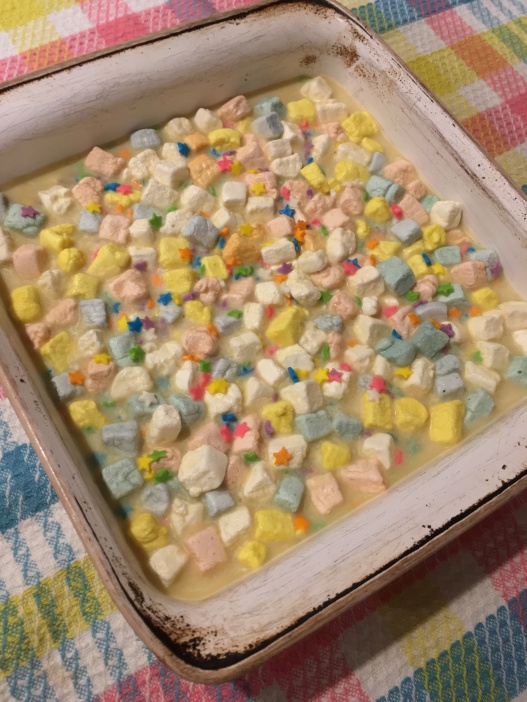
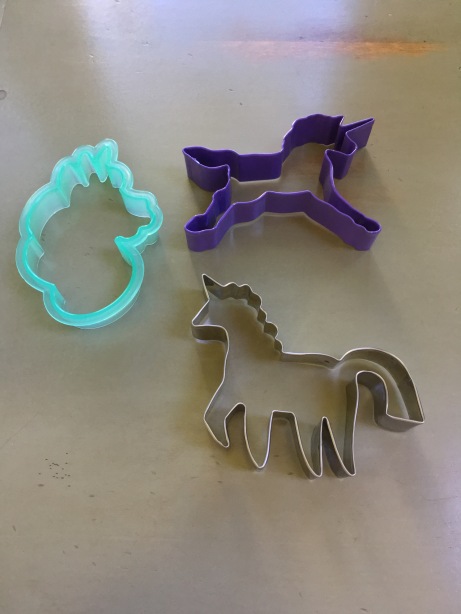
For some homemade gifts, I made my famous sour cream and onion kale chips, green tea, goji, and coconut superfood energy bars (adapted from this recipe), vegan and gluten-free marshmallow wreaths, and chocolate peppermint patties from a recipe that’s basically this (not pictured).


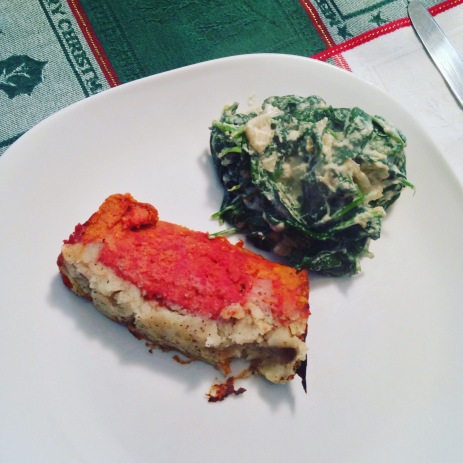
We had 4 relatives staying with us from Christmas Eve day until yesterday. My aunt and uncle and cousins have a tradition at their house of making appetizers on Christmas eve. So, I made lentil faux chopped liver dip, a spinach and artichoke dip, and we made mini potato latkes because it was also the first night of Hanukkah and my dad celebrates the holiday and loves having latkes. Instead of using eggs, we used the Neat egg for the first time and it worked out really well! There was also a salad made that I was able to eat.


For dessert, I had these gluten-free, vegan sugar cookies I made from a recipe on Minimalist Baker. Check the recipe out here.

gf sugar cookies xmas.JPG

For Christmas morning breakfast, everyone else was having bagels. My mom was nice enough to go to a local gluten-free bakery and pick up some vegan and gluten free bagels. I topped them with Kite Hill chive cream cheese, my papaya lox, and capers.

lox-bagels

For my dinner later that day, I made gluten-free, vegan stuffed shells with Kite Hill almond ricotta and pesto. I forgot to take a picture of them. We also had my favorite vegan caesar salad ever, which I also forgot to photograph, but believe there are previous posts on this blog about it.

It was a sweet Christmas! I hope you had a very merry one yourselves! As a thank you for reading, here is a picture of my three cats, that my brother photoshopped for a card.

christmas-cats

However, the best Christmas present is that I have a new recipe! For a soy curl chickun potpie that is soooo good!

WordPress has a new feature here, so I’m going to try to see what happens when I upload a word document of the recipe.

soy-curl-chickun-potpie (link to a downloadable recipe? or something)

Soy Curl Chickun Potpie

Vegan and Gluten-free

Ingredients:

  • 2 cups soy curls
  • ½ cup frozen peas
  • ½ cup frozen corn
  • 1 medium potato, chopped
  • 6-8 baby carrots chopped into rounds
  • 1 tbsp olive oil
  • 1 stalk celery, chopped
  • one small onion, chopped
  • 1 clove garlic, minced
  • 2 tbsp nutritional yeast flakes
  • 1 tsp dried rubbed sage
  • ½ cup vegan no-chicken broth, divided
  • 1 tbsp vegan butter or coconut oil
  • 3 tbsp garbanzo flour
  • 1 cup unsweetened plain coconut milk
  • 1 no-chicken bouillon cube
  • Salt and pepper, to taste
  • 2 gluten-free, vegan pie crusts, homemade or store bought

Directions:

  1. Preheat oven to 350 degrees F.
  2. Soak soy curls, corn, and peas in a bowl with enough warm water to cover. Let sit for at least 10 minutes and drain. Set aside.
  3. Steam potatoes and carrots in a steamer basket for 10 minutes.
  4. Place olive oil, celery, onions, and garlic in a skillet on medium heat and sauté until soft. Add in the soy curls, corn, peas, nutritional yeast, sage, and ¼ cup broth. Mix in the potatoes and carrots. Stir and heat until the soy curls are warm.
  5. To make a gravy for the pie, place the vegan butter and garbanzo flour in a saucepan over medium heat. Whisk until crumbly and beginning to brown. Slowly add in the coconut milk, continuing to whisk. You may need to lower the heat. Add the remaining ¼ cup broth and the bouillon cube. Keep whisking until the bouillon melts and the gravy is thick. You can add salt and pepper to taste once you turn off the heat.
  6. Add the gravy into the soy curl and vegetables.
  7. Spoon into a bottom of a pie crust. Place the top of the pie crust as you like it. Make slits in the top to allow steam to escape. You may have some leftover filling that you can eat separately or make into other dishes.
  8. Bake for 30 minutes or until the crust is golden in color.
  9. Allow to cool slightly before serving.
  10. Bon Appetit!

Enjoy the new year festivities if I don’t post before then (but I do have several posts lined up!) Happy Holidays from Banana Curl, Vegan Girl!


Italian Rainbow Cookies Veganized

During Christmas, I had this bad habit of being at the grocery store and looking at the ingredients of the Italian Christmas cookies hoping some of them would be vegan. Not a chance. I’ve been craving these all season.

After Christmas, I looked up some recipes for this type of cookie. I wasn’t sure what they would actually be called, but it was easy enough to find. I found this recipe, which I knew I could veganize with the magic vegan ingredient, aquafaba.

I was so worried I’d really mess up making these a lot earlier on. The parts I thought would fail were not as difficult as I thought. The hardest part was cutting it after I put the chocolate on top, which ended up crumbling a bit and making it not as pretty as I would have liked. The recipe makes it sound much more complicated and some of the steps are needlessly complicated, so I’m re-writing the recipe in the way I did it with the vegan substitutions.

This recipe also required making vegan almond paste (with aquafaba as well!)

That is the first step to making these babies.

Vegan Aquafaba Almond Paste

Ingredients:

  • 1.5 cups blanched almonds
  • 1.5 cups vegan powdered sugar
  • 3 tablespoons aquafaba (chickpea water/brine from a can)
  • 1.5 teaspoons almond extract
  • 1/4 teaspoon salt

Directions:

  1. In a food processor, blend the almonds until smooth and pasty.
  2. Add the powdered sugar, aquafaba, extract, and salt.
  3. Process again until smooth and dough-like (it should form into a big ball).
  4. You may need to scrape the sides down frequently throughout the process.
  5. When finished, set aside 3/4 cup for your Italian Rainbow cookies. You can save the leftovers, it’s super yummy!

IMG_6595

Veganized Italian Rainbow Cookies

Ingredients:

  • 2 sticks plus 4 tablespoons Earth Balance sticks
  • 2 cups all purpose flour
  • 1/2 teaspoon salt
  • 3/4 cup almond paste (recipe above)
  • 3/4 cup vegan sugar plus 2 tablespoons
  • 4 tablespoons aquafaba (liquid from a can of chickpeas)
  • 12 tablespoons aquafaba
  • 2 tablespoons vegan sugar
  • food coloring method of choice (red and green)
  • 15 oz Apricot Jam (not the kind with clumpy pieces in it, you want it to be smooth)
  • 10 oz vegan chocolate chips

Directions:

  1. Preheat oven to 350 degrees F.
  2. Place parchment paper on three jelly roll pans or rimmed cookie sheets and spray parchment with cooking oil.
  3. In a stand mixer bowl, place the almond paste and 3/4 cup with 2 tablespoons of sugar. Mix on the medium speed setting until crumbly.
  4. Cut the Earth Balance into small pieces and place into the the mixture while beating together until all the Earth Balance is in there and the batter is smooth.
  5. Sift 2 cups of flour and 1/2 teaspoon salt into a bowl. Add into the mixer slowly and continue to mix until combined. Do not over mix.
  6. In a large metal bowl, using a handheld electric mixer, place the 12 tablespoons of aquafaba. Whip until foamy. Slowly add in the 2 tablespoons of sugar while continuing to whip on the highest setting. Stop when you have created firm peaks (if you take out the whisks from the meringue, and place them upside down, it will not drip down).
  7. Add 1/3 of the meringue into the batter and fold in with a rubber spatula. Add the rest of the meringue and mix until fully incorporated.
  8. Place the batter evenly into 3 bowls. 1 bowl keep plain, and then add green and red to the other two bowls.
  9. Transfer the batters onto their respective cookie sheets one at a time with a wet rubber spatula . My sheets were too big to be able to spread out the batter entirely, so I tried my best to make the most even shaped rectangles on each cookie sheet so they’d match up when layered together after baking.  Don’t worry too much about it, you’ll cut the edges so they’re prettier when it’s all assembled anyhow. Just worry about making relatively even thickness rectangles for now.
  10. Bake for 4 minutes, rotate the pans around in the oven so that one pan is not on the bottom rack the whole time, and bake for another 4-6 minutes until the edges are slightly browned.
  11. Allow to cool completely.
  12. Spread a thin layer of apricot jam on top of the red layer.
  13. Cut any excess parchment paper from around the white layer. Holding the bottom of the cookie with both hands, carefully line up and flip the white layer onto the red.
  14. Spread another layer of jam. Repeat step 13 with the green layer, but do not place anymore jam on top.
  15. Cover with plastic wrap. Place a clean cookie sheet on top to press down the layers. Place something heavy and even (like two cans on either side) on top of that, and place into the refrigerator for at least 4 hours.
  16. Take off the cans, cookie sheet, and plastic wrap. With a sharp knife, trim the uneven sides into a clean rectangle shape. Let sit for a moment or a few.
  17. Melt the chocolate chips in a double boiler or microwave.
  18. Spread over the top layer and sides with a spatula.
  19. Allow to set, and then cut into smalls squares.
  20. Place in a container and store in the refrigerator or at room temperature.

Enjoy! I know I certainly will!


Happy Holidays! (xmas recap)

I’m in the mood to do a show and tell kind of post, with pictures and descriptions of my Christmas…so here it goes:

*Note: I decided to eat gluten this holiday…I need to go back to eating gluten free because I don’t feel great again, but I wanted to see how I felt with it. I’m glad I don’t have celiacs, but I’m definitely pretty sensitive. I’ve missed some of this food so much though.

IMG_6491

My brother illustrated a portrait of two of my cats for my dad’s business. It’s really cute. Cats seemed to be the theme of our Christmas this year.

In fact, I made a bunch of cat sugar cookies.

IMG_6493

Unfortunately, I am a little weak with my decoration skills.

FullSizeRender (1)

For Christmas Eve we made my Pizza Strips and this caesar salad.

IMG_6500

My orange cat, Sammy, woke me up very early on Christmas morning so I went downstairs to make some cinnamon buns with coffee icing for everyone.

IMG_6510

Yum! They were a hit with everyone. I actually bought pre-made vegan cinnamon buns and just made the icing myself, because it would have been difficult to make them from scratch in the morning and have them ready on time.

Later, we had Chef Chloe Coscarelli’s Pistachio Guacamole from her Italian cookbook for an appetizer:

IMG_6523

For my dinner I made Sporkfood’s frosted tempeh beet loaf. My mom made Chloe Coscarelli’s creamed spinach for me and twice baked potatoes.

IMG_6531

IMG_6532

For dessert we made Chloe Coscarelli’s lava cakes with raspberry sauce, So Delicious coco whip and ice cream.

IMG_6539

And I got quite a few culinary presents in the form of new cookbooks!

IMG_6545

It was quite a delicious event! I hope those of you who celebrate Christmas all had a great holiday!

IMG_6484


Vegan MoFo Day #23, Post #16: Autumn Equinox Eats and GF/V COOKIE BUTTER!

Today’s MoFo Prompt is Autumn Equinox Eats. Lately I’ve become aware of a lot of people hating on everything pumpkin. Honestly, I will eat pumpkin all year round if I feel like it (from a can when it’s not in season). I think apples may not get quite as much credit these days though.

To make up for it, I’ve been quite enthralled by juicing 2 apples and shaking the juice together with 1/4 tsp. It is seriously amazing.

IMG_5268

If you’re like me and actually enjoy pumpkin for Fall (and the occasional apple, squash, and sweet potato recipe), then take a look at all these delicious vegan fall recipes I have compiled on my Pinterest board for this purpose. And I know some people also loathe the idea of Pinterest as well…but what’s with all the negativity? It’s where I find the best online vegan/gluten free recipes from blogs and such actually, aside from MoFo.

Also TODAY I MADE HOMEMADE VEGAN GLUTEN FREE SPECULOOS COOKIE BUTTER! I cannot contain myself in not sharing it. The recipe is from Allyson Kramer. Here’s some pictures of the process.

IMG_5306

Before they were baked

IMG_5309

After baking

IMG_5314

After being made into cookie butter!

Yay! I’m sorry, I’ve been slacking a bit with MoFo, but I’m so close to being done with my bachelor of science degree it is ridiculous! So I’m focusing more on that.

Vegan Mofo Day #20, Post #15: Old family recipe veganized: Nana’s sugar cookies

This recipe can be found in my zine, Childhood Favorites Veganized that you can buy on Etsy and see more recipes I veganized from my childhood and the stories behind them.

According to my mom, this was my great grandmother’s “signature” cookie.

PS: In the zine on the page this recipe is on there is a picture of me with a face covered in chocolate frosting as a child (pictures of me with my food covered face are a common theme in my childhood photo albums). Awhile ago, as part of the zine, I decided to recreate these types of pictures but with a twist–I’m not a kid anymore…

IMG_3087

and because I wanted literal banana curls:

IMG_3083

Doesn’t quite have the same effect as the childhood photos, haha!

On to the cookie recipe:

Ingredients:

  • 1/2 cup non-hydrogenated vegetable shortening
  • 1/2 cup vegan margarine such as Earth Balance
  • 1 cup vegan white sugar
  • 2 cups flour
  • 1 tsp vanilla
  • 1/4 cup almond milk
  • 1 1/2 tsp Ener-g egg replacer, 2 tbsp water whisked together
  • Extra sugar set aside in a shallow bowl for finishing the cookies

Directions:

  1. Preheat oven to 350 degrees F.
  2. Mix ingredients together.
  3. Roll into balls.
  4. Dip a fork in the sugar in the bowl. Press down with the fork onto the ball of dough, making an imprint. Repeat in a criss-cross pattern.
  5. Bake in the oven for 10-12 minutes.